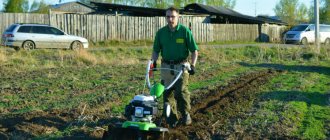
What are hedgehogs for weeding potatoes and why are they needed?
Hedgehogs are an important agricultural tool, the main purpose of which is to save the gardener’s time and effort through high-quality and careful weeding of potato beds.
Along with their main function, they successfully loosen the soil and hill up emerging seedlings, while at the same time scaring off moles and other rodents in the cultivated soil.
What is their advantage
The advantage of hedgehogs for weeding potatoes, in addition to functionality, is that they can be used with all types of cultivators (manual, electric or gasoline).
This makes the tool suitable for use both in small individual areas and on an industrial scale.
What are they?
Despite the fact that the main function of all hedgehogs is the same, there are several types of such tools, with slightly different designs.
Differences affect the effectiveness of a hedgehog in an area of one size or another.
For processing potatoes in one furrow
Single-furrow potato hedgehogs are designed for weeding small areas. The simplified design of this type of hedgehog makes the work of the gardener easier, representing a pipe 250 mm long, on which several disks with metal spikes 150-200 mm long are fixed.
Fastening is carried out by 2 bearings and a shaft. This design is usually attached to a walk-behind tractor to simplify the work and save time when weeding potatoes.
For weeding potatoes on bearings
Hedgehogs on bearings are designed for weeding beds ranging in size from 60 to 90 cm. They are used immediately after emergence and after ground tillage.
The advantage of this type of hedgehogs is that they have a bearing unit, which provides additional fixation, as well as 3-position adjustment of the weeding angle, which ensures high-quality loosening of the earth.
Rotary weeding
The purpose of rotary hedgehogs is pre- and post-emergence soil treatment. These hedgehogs simultaneously fluff up and hill up the soil, while removing weeds. In this case, the row spacing varies between 50-75 cm.
Processing potatoes with rotary hedgehogs is not a labor-intensive process, since the rippers can be attached to any walk-behind tractor, cultivator, and even mini-tractor.
How to design a trencher
A homemade trencher is a mounted attachment to a walk-behind tractor that allows you to quickly and effortlessly dig trenches and holes. It is a kind of compact excavator that is maneuverable and economical. Moves on wheels or tracks.
How to remove ants from a greenhouse
The digging attachment allows you to dig trenches and holes even in frozen ground. The walls of the trenches are smooth, without crumbling. The developed soil is light and crumbly and can be used for backfilling.
Two cutters are attached to the front suspension, and a shovel is attached to the rear suspension to remove soil from the trench. Safety guards must be secured to the cutting discs and chain drive. Using the same principle, a drill attachment is made from a metal rod and plates.
How to make hedgehogs with your own hands
Making hedgehogs for a potato cultivator with your own hands is a painstaking, but obligatory step to ensure the most comfortable use of the future tool.
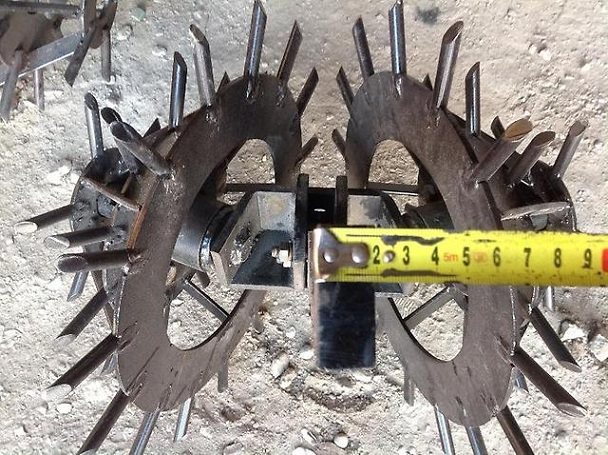
The metal structure consists of 3 rows of disks of different diameters with metal spikes welded to them. The disks are connected to each other by special jumpers. The device is assembled on an inch pipe, inside of which there is a 20 mm fixed axis attached to a bracket on the handle.
Necessary materials
You will need:
- steel sheets with a thickness of at least 4 mm for future disks;
- strip of carbon steel with a width of 20 mm and a thickness of 4 mm for jumpers;
- metal rods with a diameter of at least 8 mm and a length of 100-140 mm for spikes;
- pipe with a diameter of 250 mm for the frame;
- steel U-shaped bracket with a thickness of at least 4 mm and a width of 70 mm;
- a metal rod with a diameter of 20 mm, which is placed inside a pipe filled with thick lubricant, and the ends are inserted into the holes of the bracket.
Preparatory stage
At the preparatory stage of creation, you need to collect all the tools that will be needed in the process of making hedgehogs: a welding machine, an angle grinder, a metal cutter, and a set of plumbing tools. You should also prepare drawings of future hedgehogs (see examples below).
Step by step creation
Instructions:
- It is necessary to cut a piece from the steel pipe in accordance with the size of the row spacing on the site.
- Cut tenons 120 mm long from the rod and sharpen their edges at 45°. On average, 75-90 spines are required for 2 hedgehogs.
- Cut discs from a metal sheet. The optimal diameter is 300, 200 and 100 mm. Cut holes in these blanks for the pipe. The diameter of the holes must be 1 mm larger so that the discs can be inserted and welded to the pipe.
- Finish the parts with a grinder to eliminate burrs and irregularities.
- Distribute the spikes evenly across the discs. On average, each requires 7-15 pieces.
- Bend the bracket on which the axle will be attached. The bracket can either be welded or have holes made in it for bolted connections.
- Put the pieces together. There should be a distance of 150-160 mm between the discs. Insert the ends of the axles into the holes of the brackets. Secure them with nuts or welding.
- Use a grinder to clean all sharp corners and irregularities.
Marker for planting potatoes
A marker is a device that is necessary to facilitate manual activities when planting, as well as to ensure that the beds are level, with evenly distributed holes for potatoes. Subsequently, such beds are not difficult to process using mechanized or manual devices.
Marker for planting potatoes
Today you can buy ready-made markers, but it is better to make a homemade device, then the distance between adjacent plows, for organizing holes for planting, will fully correspond to the distance between the wheels of a motor cultivator or tractor.
Markers can be basic or very complex. You can make them from any material you have at hand:
- Wooden stakes;
- Durable board;
- Special or round metal pipes.
It doesn’t matter what the device’s handle or frame is made of, the main thing is the distance between the components that make the holes.
Elementary marker
This is a wooden stake approximately 90 centimeters high and about 60-70 millimeters in diameter. A horizontal rod, which is fixed at a height of about 150 millimeters from the base, will serve as a support that limits the depth of the hole. Before you start working with this device, you need to mark out future holes using twine. It is stretched along the length of the rows at a distance of approximately 40, 50, 60, 70 or 80 centimeters between the beds.
Solar vegetarian: characteristics, building a greenhouse with your own hands, photos, videos - greenhouse tips
The distance between the beds depends on the subsequent method of tillage, manual or mechanized. The gap between the holes in the row is about 30 centimeters, depending on the size and variety of potatoes that will be planted.
Mittlider Marker
This is a more complex version of the marker, which is made from a pipe with an external diameter of 21 millimeters. The distance between the holes will be 29 centimeters. The cone with which the holes are made is made from a pipe Ø 55-65 millimeters. It must be welded to the frame.
Mittlider marker blueprint
On the initial row, the frame is placed parallel to the twine and, applying the necessary force, is immersed in the soil. Then we place a cone in the hole that we have marked, and continue like this. In another row, holes are made like on a chessboard. A marker made using this method allows you to plant potatoes in small areas while obtaining a high yield.
Three holes at once
This model consists of metal pipes and 3 cones.
Marker drawing for planting potatoes in 3 holes
The welded frame of the marker is made from a special light and strong pipe measuring 25x25x2 millimeters. To do this, you can take an ordinary steel pipe Ø 32 millimeters, which is used for water supply or gas pipelines. Cones are made of aluminum or acacia wood, oak.
A hole is made in the cylindrical part and an M8 thread is cut. Three such through holes Ø 9 millimeters are made in the pipe. Through these holes the cones are attached to the frame with M8 bolts. Using bolts measuring 40-80 millimeters, you can adjust the depth of the hole. The distance between the cones is 45 centimeters. To avoid injury, plugs must be placed on the open ends of the supporting pipe. The height of the bolts may vary. This will depend on the depth of the hole required. The larger the bolt, the wider the possibilities.
Marker for planting potatoes in 3 holes
Wooden cones must be sanded, varnished or drying oil applied so that soil does not stick to them when working. All metal components must be treated against corrosion. The height of the frame must be adjusted to your height. The values indicated in the drawing are suitable for a summer resident with a height of 175 centimeters.
Drawings with dimensions and explanation
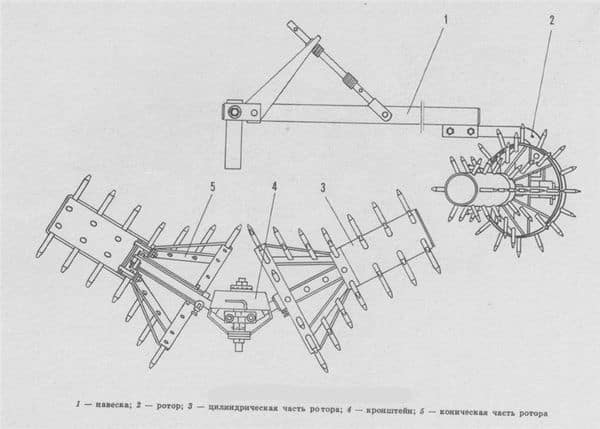
Drawing No. 1 shows a cross-section of a hedgehog and its main parts:
- 1 – hitch;
- 2 – rotor (rotating shaft);
- 3 – cylindrical part of the rotor;
- 4 – bracket that connects the hedgehogs;
- 5 – conical part of the rotor on which the disks are fixed.
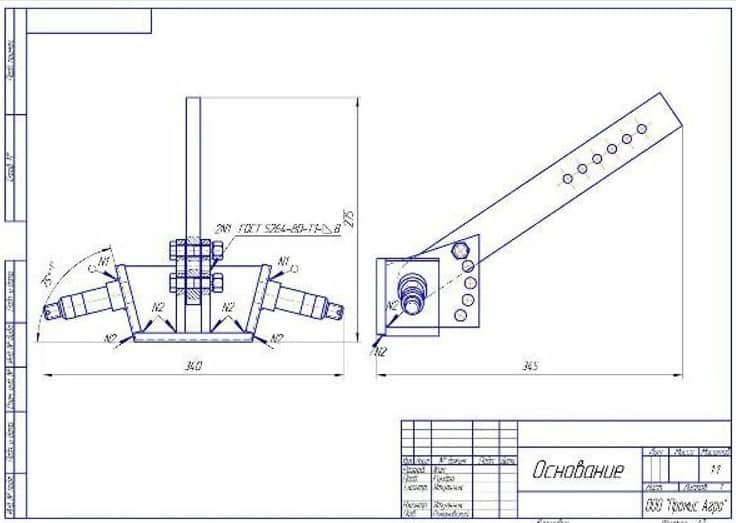
Drawing No. 2 shows the base of the hedgehog along with the bracket, as well as their optimal dimensions. The height of the device is 275 mm, width – 340 mm, and length – 345 mm. The rotor angle is 75°.
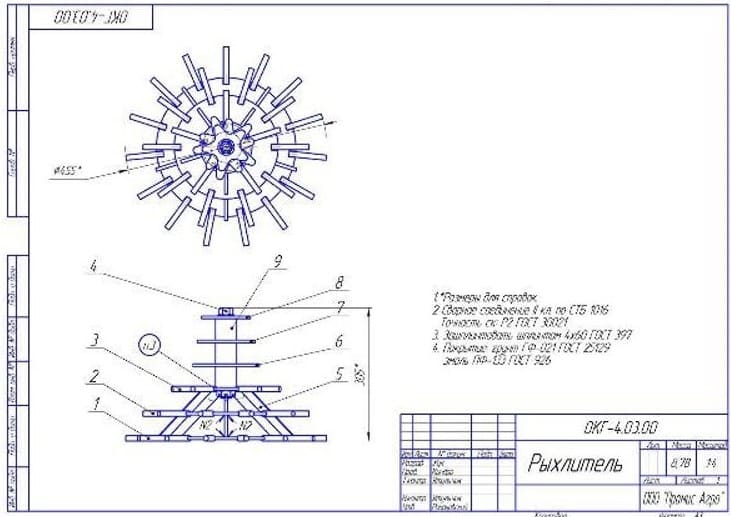
Drawing No. 3 shows a cross-section of a conical ripper:
- 1, 2, 3, 6, 7, 8 – discs with spikes;
- 4 – fixing bolt;
- 5 – bar that connects the disks to each other;
- 9 – rotor.
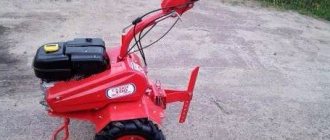
How to use hedgehogs on a walk-behind tractor
Operating rules:
- Do not attach hedgehogs to the back of the walk-behind tractor, because in the event of an unexpected impact, not only the base of the device, but also the walk-behind tractor itself may be damaged.
- Regularly clean the hedgehogs' spines of weeds and soil.
- Use hedgehogs only in dry weather. Frequent contact with wet soil can cause rust. Treat hedgehogs with anti-corrosion agents at the end and before the beginning of each season.
- Sharpen only the lowermost part of the tenons. Otherwise, hedgehogs will cut off the weeds, leaving roots in the ground. For sharpening, use a grinder with the finest abrasive wheels.
How to attach
The hedgehogs are attached to the walk-behind tractor using bushings and jumpers at an angle of 45°.
To reduce the load on the attached structure, 2 guide wheels are installed. They can be strengthened with a bracket, which is made from a metal strip at least 70 mm wide and 4 mm thick.
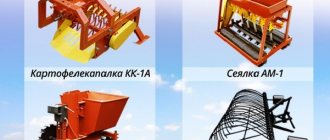
Manufacturing of other hanging structures
The walk-behind tractor can be equipped with a variety of useful devices - a plow, a rake, all kinds of shovels, mowers, skis, brushes. Desire, clear diagrams and descriptions of work will help you replicate store-bought analogues of hanging elements and even improve them, since they will meet individual requirements and conditions.
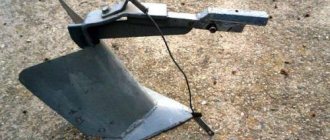
So, to cultivate the land you need a plow that can overcome virgin soil, overgrown with grass, wet or stale soil. To make it you will need a steel plate about 5 mm thick. Using rollers, the plate is bent into a cylinder. The edges are sharpened with a grinder.
Sugar free jam
Using the same principle, it is easy to make an attachment that forms furrows. It’s good if there are cultivator stands. They can be attached to a corner or two racks can be made from scrap materials. To do this, plates are cut from a metal sheet 1.5-2 mm thick. The size of the plates should correspond to the depth and width of the furrow. They are fastened with bolts to the racks of the structure. This attachment can be used for instillation. You just have to give the plates the required shape. They must be in the form of a disk or circle, located at a certain angle. Such plates are located closer at the top than at the bottom. Due to this, the disks, rotating, open the cavities outward.
The attachment to the walk-behind tractor for collecting cranberries contains a self-propelled platform on caterpillar tracks. An intake is attached to the rotating frame of the platform. It is made in the form of a box with curved parallel teeth. While moving, the device, using the draft from the fan, captures the berries into the box. The fan is powered by a motor. Helical spirals are installed in the box.
Picked cranberries are heavier than garbage, so they fall to the bottom of the container. Leaves and small specks that fall along with the cranberries are removed through the hole along with the air flow from the fan.
A brush for a walk-behind tractor is used to clean the area not only from leaves, but also from shallow snow. Simplicity, efficiency and versatility of use are the obvious advantages of this hanging element. The brush shaft is vertically attached to the walk-behind tractor. A ring and discs with brushes are alternately put on it. The diameter of the rings is 350 mm. The grip width of such a brush is usually made no more than one meter. This way the walk-behind tractor retains maneuverability and covers a fairly large surface area for cleaning.
The length of the bristles is 40-50 cm, otherwise it will soon begin to wrinkle and break. It is not possible to restore the properties of the bristles, just attach new discs. The speed of movement of a walk-behind tractor with a mounted brush varies in the range of 2-5 km/h, depending on the engine power of the unit.
To learn how to make a plow for a walk-behind tractor with your own hands, see the following video.
Reviews from experienced gardeners
Gardeners who used hedgehogs to weed potatoes share their impressions.
Vitaly Panasenkov, Krasnodar: “I recommend buying hedgehogs for a walk-behind tractor in a special store. Otherwise, you will have to draw up a really competent drawing of a hedgehog, otherwise the effectiveness of weeding will be minimal.”
Anton Krasnov, Izhevsk: “Don’t forget to paint the hedgehogs. This will save the wheels from rust much better than any anti-corrosion agent.”
This is interesting:
What does the trimmer attachment for weeding potatoes look like and how to use it correctly
Detailed descriptions and effective methods for treating potato diseases
Reasons for tops drying out and whether potatoes grow after this