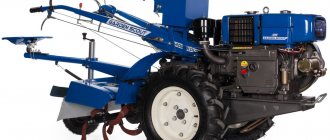
DIY tracked snowmobile from a walk-behind tractor
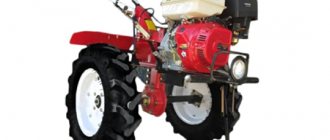
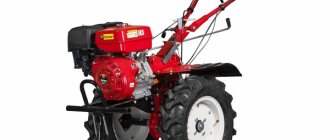
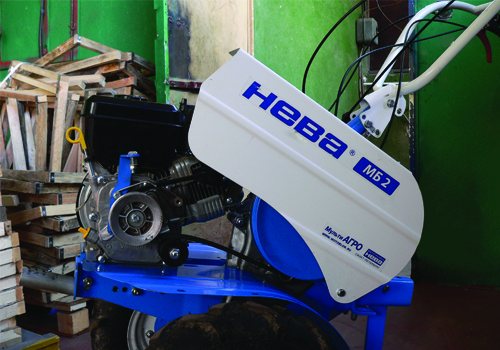
To make a tracked snowmobile from a walk-behind tractor with your own hands, simple materials are used. The frame is made of stamped channels and square pipes. Round water and gas pipes were used to make the shafts. The engine was used from the Neva walk-behind tractor.
The snowmobile looked a little rough. But after conducting winter tests, good driving characteristics were revealed: speed, cross-country ability. It is also light and compact, and quite economical in fuel consumption. The original design assumed an asymmetrical engine arrangement. This provided a number of advantages: during maintenance - good access to the engine; convenient starting and gear shifting; redirecting the chain drive directly to the track drive shaft.
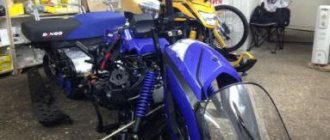
But during testing, when moving on loose snow, when making a turn, the snowmobile often fell over. Because of this circumstance, it was decided to place the engine in the center of the front of the snowmobile. The design has been improved, especially the front of the frame. An intermediate shaft was also installed, which transmitted torque from the engine to the track. In addition, modernization was carried out, which improved the driving performance, comfort and reliability of the snowmobile.
How to make a snowmobile from a walk-behind tractor with tracks
Diagram of drive units and frame of a homemade snowmobile from a walk-behind tractor:
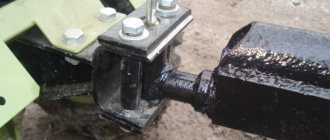
To place the engine with the subframe in the center of the front part of the frame, a platform was welded there in which holes were prepared for the “legs” of the subframe. Similar holes are made in the traverse. The holes in the “legs” of the subframe were converted into longitudinal slots to tension the drive chain when moving the engine.
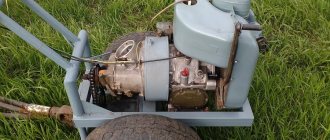
The underframe has also been redesigned and moved back a little. Thanks to this, the engine is started on the handle. A big plus was the presence of a forced cooling walk-behind tractor on the engine. I used this to direct the air heated while cooling the engine to the carburetor. The gas tank was also moved to the body. It is installed there on stands in the corner to supply gasoline to the carburetor by gravity through a long hose.
Moving the engine to the center of the car resulted in increased stability. Thanks to this, the track of the steering skis was reduced to 950 mm, which led to improved maneuverability of the snowmobile.
After the intermediate shaft was installed, the angular velocity was reduced due to the increase in torque. The speed of the snowmobile was slightly reduced, but the traction characteristics were significantly increased. Now the snowmobile is able to carry two riders with a load, and pull a light sled with luggage. The drive sprockets of the caterpillar mover were also replaced with the same ones of a smaller diameter.
Diagram of a snowmobile steering column made from a walk-behind tractor
- Steering column diagram:
- front frame cross member (1);
- stand made of steel pipe (2);
- steering wheel support made from angle 25x25 (3);
- steering shaft made of steel pipe (4);
- crossbar made of steel pipe 28x28 (5);
- bipod (6); bronze washer (7);
- support sleeve with angle (8);
- nut, type M10 (9).
Chainsaw snowmobile
Advice. The snowmobile can be made as either a tracked vehicle or a ski vehicle.
Construction of a snowmobile from a walk-behind tractor
Multiplayer?
Not by mistake. The only option is to play two players on the same computer screen form halves, but this option requires at least one joypad - one keyboard simply won't fit, so you won't be able to even try the game. At first glance, it's a pleasant game, but it doesn't bring anything new, and after a few hours you'll start to get bored. Are you too fast and need to look? Even if it's downhill, you need to add gas and ride like a motorcycle. Powerful engines, front fork suspension, drive, tip and power transmission are all almost the same for motorcycles and scooters. Before you start making a snowmobile from a chainsaw, you need to choose equipment that will have all the necessary characteristics. The best option for this purpose is the Druzhba, Ural and Shtil chainsaw (the power of these tools is ideal for creating high-speed snowmobiles).
Important! The engine and gearbox are the main parts of the chainsaw that are used during operation.
In both areas, designers are aiming for the lowest overall weight, better ride front and rear, but, importantly, the most interesting thing - although currently there is a chance to test only in Canada and in the areas, Circle, in our conditions, only in very favorable conditions for victories in winter. The two pointers can send a maximum of 80 horsepower underwater.
While not a big deal in the whooping world, it is overwhelmingly used for towing and prize pulling. Lots of good equipment includes all the amenities that snipers have to offer. Safety glide, tubular luggage racks, heater handle including gas valves.
The snowmobile design consists of four parts:
- Caterpillars.
- Transmissions.
- Engine.
Chainsaw Ural
The assembly of a homemade snowmobile is carried out not according to some proposed scheme or standard drawing, but based on the materials and tools that the master has at his disposal.
Drawings, options for finished work
Just pressing a button will switch the dial to the back, and if you want to install more lights, you can easily remove the passenger seat and get more parking space.
The scooter is built as an all-rounder, designed for work, while other models are distinguished mainly by the large lights, the already mentioned protective screen and carrier. And then a good tubular bumper, thanks to you, it doesn't cut broken plastic. With a relatively light venture, it handles well when driving in tight spaces or when needed, the automatic transmission is tuned for smoothness. But if you add full throttle to a steep hill, in addition to the slower thrust, there will be a smaller engine, and proper racing will not occur.
Instructions for assembling a snowmobile from a chainsaw
Assembling a product is quite an interesting job. It consists of several successive steps that must be performed carefully and responsibly.
- The first stage is the assembly of the frame base of the future homemade snowmobile. For work you will need steel corners (size - 50 x 36 cm) or steel sheets (thickness - at least 2 mm). The middle part of the structure is made from the corners, and the front and back are made from sheets.
Advice. To give the necessary rigidity to the structure, the metal is bent at an angle of 90 degrees.
Using the Drive Wheel
Combined with a silent engine, the racing performance of sports personnel is a must.
Regardless, it will be a bit of a "fit" with it. He stays with his feet under the clamping pipes above the steps and leans a little towards the car and brings joy. The sport is not, but it provides good feedback on the bookmarks, and you get a feel for exactly what you can afford and when the scout jumps to the side. The massive car weighs in at over 300 kilograms with a full five-liter load, and it feels a lot tougher than the previous five. It requires slightly different access to the controls, there's not as much flex and ride involved, much more throttle-driven.
- Carefully make two through holes to accommodate the track shaft and track wheel guides (tensioners are installed on both sides of the side members).
Important! The front device is specifically designed to tension the second stage of the idler gear, and it also helps in adjusting the track itself.
The situation, however, changes on the surface, where the front skid does not become too strong, and the tight bends should be distorted under the gas. With boost, the feedback is mostly muted in my hands and my motor is constantly held and the sketch is mounted on one skier. When the front skis finally bite to the side and lie sideways in the middle. Luckily it's a good idea, with the plastic heads allowing the spur to turn easily and even need to straighten the mirrors.
Finally, I am rewarded with a sportier ride. He'll add gas at just the right moment and the dagger will gracefully growl a lot of drift before hitting the sharp slopes hard. On a deeper hit the machine will actually let go and say rush or just one ski. It's a shame that the instructors forbade us to jump over the harbors and other "skeptics", for them the powerful Viper is hiding. On the other hand, the gearbox configuration is not as good as shoveling or moving slowly between cable tracks.
- Special brackets are carefully welded to the bottom of the side members (they are attached at the same distance from each other), support rollers are installed in their open grooves.
- The rollers (in rubber covers) are placed on five axes, each of which is attached to the underside of the open grooves.
- Between each of the elements special bushings made of duralumin are installed (they are made from a suitable pipe).
Advice. In order not to waste time making rollers and axles for them, they can be borrowed from old equipment for digging up potatoes.
- The bracket axles themselves are secured using nuts and locknuts (they are designed to strengthen the snowmobile frame and hold the side members at a certain distance from each other).
- Three metal corners are used to make racks for attaching the prepared chainsaw gearbox, and install the intermediate shaft of the chain drive.
- A seat for the user is installed on the prepared frame (a suitable box or car seat is used for these purposes), it is fixed in the area between the middle and rear parts of the structure.
Chainsaw snowmobile
- A hole is made in the front section of the frame to accommodate the steering wheel; it is made from a pipe with welded control handles.
- Metal gussets are installed in the places where the snowmobile racks are attached (they strengthen the structure, make it stronger and more reliable).
Important! In order for the future homemade snowmobile to have good maneuverability in snowy terrain, it is equipped with a caterpillar mechanism.
- A snowmobile drive shaft is made from a metal pipe, and a special round flange is inserted into it for attaching gears.
- To create the steering, equipment from old motorcycles or mopeds with three-lever control is used.
The finished snowmobile is light in weight and can easily be placed in the trunk of a car for transportation over long distances. Its controls are so simple and intuitive that even a child can easily use it.
Snowmobile from walk-behind tractor video
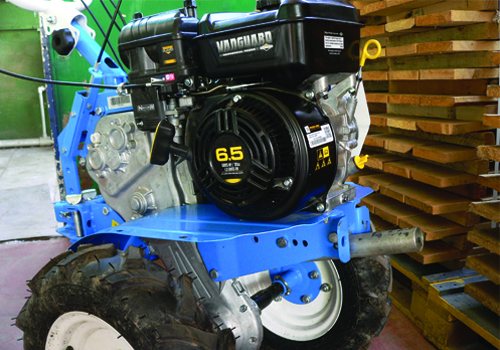
After people see the prices for snowmobiles in a store, they ask the question of how to make a snowmobile from a walk-behind tractor yourself, how expensive and difficult is it? How do you start making a homemade snowmobile from a walk-behind tractor? First you need to determine what engine power to use. We used a 6 horsepower walk-behind tractor engine as the engine. Typically, four-stroke engines with forced air or water cooling are installed on walk-behind tractors.
From the walk-behind tractor you can also use a reverse gearbox, a centrifugal clutch, steering and a fuel tank. Next, you need to think about the snowmobile's propulsion system. Most of them are equipped with a caterpillar drive.
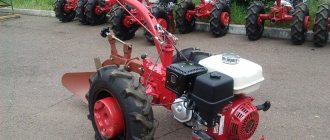
Why walk-behind tractor?
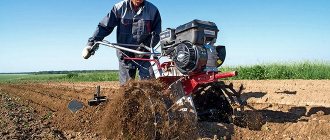
An inventive owner will always find a use for his technology. So, in the summer, a walk-behind tractor can be used as the main workhorse on a personal plot, and in the winter, so that it does not stand idle, it is converted into another vehicle. A snowmobile from a walk-behind tractor is obtained by dismantling the power unit from the second and installing it on the frame of the first.
Thus, the main element that is required to obtain a snowmobile from a walk-behind tractor is? this is the engine. For the same purposes, people also use engines from motorcycles and ATVs, and if you search on the Internet, you can also find lightweight options with engines from chainsaws.
Despite such an abundance of technical devices from which the motor can be removed, inventors most often use the heart of the walk-behind tractor. This is explained by the fact that to move on a snow floor, high torque is required with a low specific gravity. Walk-behind tractor motors, having significant power and low weight, produce very high torque. The power of a self-made snowmobile will directly depend on the power of the existing walk-behind tractor. As a rule, the power of the engines used is about 10–12 hp. Such units will allow future transport to reach speeds of up to 60 km/h.
Also, in order to make a snowmobile with your own hands, you need to remove the steering arms from the walk-behind tractor or use a motorcycle handlebar. On the new vehicle, these devices will also provide controllability and maneuverability. Only in the case of the winter version of the equipment will they control the skis.
Frames from old motorcycles or mopeds are used for the snowmobile frame. To bend or bend them in a new place, you should get a pipe bender. To assemble a new frame you will need a welding machine. You will also need skis, a drive shaft and tracks. You can make your own caterpillars from rubber, and you can use wood, metal or plastic plates as hooks on them. Homemade snowmobiles, converted from a walk-behind tractor, can have wheels instead of tracks in the chassis.
The best homemade products - a snowmobile from a walk-behind tractor
When making a homemade snowmobile, they use tracks from other snowmobiles, or homemade ones assembled from scrap materials. After choosing a track, you need to decide what type of suspension to use. You need to choose from two main types: roller suspension and skid suspension.
Each of them has both advantages and disadvantages. After this, it is important to decide what kind of layout the snowmobile will have. Typically, a snowmobile is equipped with two steering skis at the front and a track block at the rear.
The engine can be installed either at the rear or at the front of the snowmobile.
Skids and engine
Wide skis are used as runners, which are attached to the steering column using a hinge joint. For the front suspension, you should use shock absorbers from a motorcycle.
The engine is installed on the leading part of a homemade snowmobile. However, before installing the engine, it is necessary to decide what exactly to use - wheels or tracks. Each of these options has advantages and disadvantages.
If wheels are installed, the all-terrain vehicle made from a walk-behind tractor will be more maneuverable. If you make tracks, the snowmobile's cross-country ability increases, but at the same time it becomes heavier.
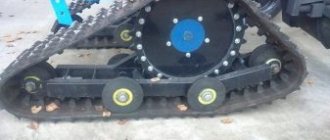
How to make a homemade snowmobile from a walk-behind tractor on tracks
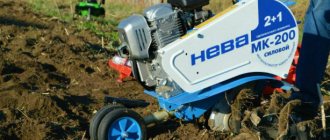
Four wheels are installed inside the track. When movement occurs, they roll along a conveyor belt with fixed lugs. The caterpillar drive is carried out by a chain from the motor, special drive sprockets, through the driven shaft. They were taken from Buran.
The engine is taken from a conventional walk-behind tractor with a power of 6 hp. You won't be able to accelerate quickly on it. The soft ski and track suspension have been removed because the sled is designed to ride on powder. This simplified the design and reduced the weight of the snowmobile.
How a walk-behind tractor is converted into a snowmobile
The basis of the snowmobile is the walk-behind tractor, since many land owners have this unit. However, they are usually not used in winter. Having built a simple snowmobile, you can install an engine from a walk-behind tractor on it, which can be returned after the end of winter.
The snowmobiles created usually have a power of about 7 hp, which allows them to transport two people with a small load.
In order to assemble an all-terrain vehicle from a walk-behind tractor with your own hands, you need to have the following basic parts and tools:
- welding machine;
- engine;
- pipe bender
You will also need additional details, which you can learn about by taking a more detailed look at the design of the snowmobile. Before making a snowmobile, it is worth drawing up a detailed drawing.
Homemade snowmobile from a walk-behind tractor video
A walk-behind tractor is a universal device for agricultural work. The device is considered universal due to the fact that the design suggests the possibility of its reconstruction. You can make an ATV or a snowmobile with your own hands from a walk-behind tractor. Such conversion does not require significant financial costs or skills, and one machine will perform many functions.
It is advisable to convert a walk-behind tractor into a snowmobile, if only because of the price: the cost of the most primitive machine for moving on snow ranges from 3.5 thousand to 5 thousand dollars. There are also models costing over 10 thousand dollars.
Not everyone can buy a regular snowmobile, so if you urgently need a winter vehicle, you can use a walk-behind tractor. Such homemade products are very popular among rural residents.
Homemade snowmobiles from a walk-behind tractor
Not every walk-behind tractor is converted into a snowmobile, so before purchasing a power unit, pay attention to the following technical features:
- Availability of rear towbar.
- The engine is not lower than middle class.
- Manual control is required.
- Air-cooled motor.
When the power unit has been purchased, proceed to its conversion. The main tools and parts that will be needed for this are a small list:
- welding machine;
- pipe bender;
- tracks, two wide skis or wheels;
- auxiliary details.
The main thing is to select all the parts necessary for the transformation. Some of them are made independently. Design begins with choosing a snowmobile model. Snowmobiles are divided into two main classes: wheeled snowmobiles and tracked snowmobiles. It is advisable to first make a layout.
Converting a walk-behind tractor into a snowmobile
The first and second stages consist of manufacturing the frame and mounting the power unit:
- The frame is made from old motorcycle or car pipes. A pipe bender will help to shape it.
- The joints are processed by spot welding.
- We move the engine to the center of the housing structure.
- We place the engine on a specially made platform with fasteners for fixing the motor itself.
Mounting the motor on a special platform is very important, since otherwise it may become clogged with snow and, as a result, burn out.
The installation of the steering wheel and seat is chosen by the master independently - the main thing is that it is comfortable to operate the device. Depending on the engine power, the snowmobile can accommodate several passengers.
Preserving a walk-behind tractor engine for the winter
Preservation of the engine is carried out in accordance with the Operation Manual. For information on how to prepare the power unit for wintering, read the “Preparation for long-term storage” section of the instructions. This article provides general rules of care. And so, in order for the engine to start easily in the spring and run stably, you need to do the following:
- Start the engine and, closing the fuel valve, drain fuel from the carburetor until the engine stops.
- Allow the engine to cool, then drain the fuel from the fuel tank and dry the tank.
- Replace the engine oil with new one.
- Disconnect the high voltage wire from the spark plug
- Clean the spark plug, soak it in gasoline and dry it. Then pour 15-20 ml of engine oil into the cylinder and, pulling the starter cord, slowly turn the crankshaft by hand several revolutions so that the oil is distributed over all parts. Then return the spark plug to its place and lightly pull the starter cord again until resistance is felt. In this case, the valves will be closed, which will not allow moisture to enter the engine cylinder (this procedure extends the service life of the engine cylinder-piston group)
- Clean the air filters. In order to remove dirt from a paper filter element, you need to tap it several times on a hard surface or blow out the element from the inside with compressed air. It is strictly not recommended to remove dirt with a brush, because... this will drive the dirt further into the fibrous structure. The porous filter element should be cleaned in warm soapy water, rinsed and dried thoroughly. Then dip into clean engine oil and squeeze out excess oil. If excess oil is left on the porous element, the engine will smoke when starting. In the oil-air filter, it is necessary to rinse the air cleaner housing from oil and accumulated dirt and allow it to dry. Then fill the housing to the oil level mark with the same oil recommended for the engine.
- With the fuel tank open and the engine turned off, pull the starter handle 2-3 times a month (this will prevent the rings from getting stuck in the cylinder)
- Disconnect the “–” terminal (to save battery charge)
- Close the engine choke;
- Preserve electrical equipment (with special lubricants).
- Recharge the battery monthly (to extend its service life)
Preparing the walk-behind tractor for winter
Engine preservation
Snowmobile made from a walk-behind tractor on wheels
The wheeled snowmobile is popular due to its sufficient maneuverability. But there is also a negative point - the wheels can fall into the snow. A snowmobile on wheels or low-pressure chambers (pneumatics) is easy to assemble. Wheels can be purchased at the store or made yourself.
The main attention should be paid to the choice of power unit - the motor on the walk-behind tractor must be as powerful as possible, otherwise the unit will not be able to perform its specific functions - moving on snow or ice.
It is important to properly design the drives and frame of the all-terrain vehicle. It is desirable that each wheel has a separate drive. This will significantly simplify control in extreme conditions. For a snowmobile, four wheels are most often used, since three-wheeled vehicles are less stable.
Low pressure wheels and wide skis are often combined. Thus, the stability and maneuverability of the device increases, but maneuverability does not decrease.
Homemade snowmobile on wheels
Crawler snowmobile
Snowmobiles made from a walk-behind tractor on tracks are characterized by high cross-country ability. But due to their enormous mass, they are more difficult to control and maneuverability deteriorates. In addition, the cost of installing tracks is different from skis or wheels.
You can make the tracks yourself, but this is a long and complicated process. At the same time, there are several features of a tracked vehicle for driving through snow:
- The motor is installed in the traction part, so you will have to significantly alter the walk-behind tractor frame.
- If the tracks are made independently, then attention is paid to the quality of the connections.
- The seat and steering part are installed so that the balance of all components of the unit is maintained.
You should not accelerate to high speeds on tracked snowmobiles. This may lead to an accident.
Converting a walk-behind tractor into a tracked snowmobile is not difficult, the main thing is to take care of safety.
Snowmobile type tubifex-stick insect
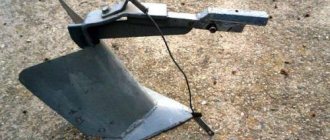
Homemade tracked motor-block snowmobiles can be divided into two main groups depending on the material of the snow hooks: “pipe bugs” and “stick bugs”. They differ in the material used for the tracks. To make the track structure more durable and resistant to deformation, tubes (ordinary plastic water pipes) are used. But in this case, the grip of the tracks and snow is low.
Drawing of tracks for a stick insect snowmobile
Another variation uses a wooden beam for the tracks. The service life of this method of arranging tracks is not very long, but the adhesion to the surface is much higher.
Swamp walkers from a walk-behind tractor
Self-made swamp vehicles, in their principle of operation and design, completely repeat the design of a snowmobile. Both have the same principle - to reduce the pressure on the surface on which the unit will move. To create a swamp vehicle, it is important to select or make wheels or tracks yourself - the width should be much larger than the standard.
To create a motor-block snow and swamp-going vehicle, follow the approximate plan:
- Strengthening the frame or rebuilding it is carried out by installing additional pipes.
- The motor and steering wheel are placed on the frame.
- The chassis and front sprockets are also installed here.
- An intermediate shaft with rubber linings is installed.
For the undercarriage, you can use tires or tracks. Each option is special in its own way, and all the characteristics for creating a tracked and wheeled unit are described above.
- Author: Maria Sukhorukikh
Rate this article:
- 5
- 4
- 3
- 2
- 1
(0 votes, average: 0 out of 5)
Share with your friends!