Choosing a design
So, you decided to rely on your skillful hands and make a homemade garage lift, rather than purchasing it at a specialty equipment store. This is an understandable desire: the cost of such equipment may not be much less than the cost of your car, and it will rarely be used (only if you are not going to open a service station in the garage).
The idea has arisen, the desire too, now it’s time to choose the design of the device being created . To do this, you should pay attention to factory-made lifts presented on the special equipment market, “peek” at their design and imagine whether you can do something similar.
Most likely, the first thing you will see is a two-post lift , which can be found in almost every auto repair shop. This type of device can be equipped with an electromechanical or electrohydraulic drive.
In the first case, inside each rack there is a threaded shaft rotated by an electric motor with a gearbox. There is a bearing nut on the threaded shaft, which moves along it and accordingly raises and lowers the “legs” on which the car rests.
In a two-post electro-hydraulic lift, the shaft is replaced by a hydraulic drive, the pressure in which is created by an electric motor.
There are
other options of a similar design , but with one, three or four racks.
Another type of lift is a scissor , where a platform with a system of levers (called “scissors”) is raised and lowered using hydraulic actuators driven by electric motors.
When creating such designs, you may encounter many questions and problems that need to be solved. First of all, this is work safety - no one wants to get seriously injured or disfigured due to a broken lift on one unlucky day.
Therefore, you should choose the materials and design of the device so that it can withstand the weight of the car, and with a significant margin .
It is also worth taking care of the manufacture of locking mechanisms that allow you to hold the car in place in emergency situations with the lift.
And the main problem faced by those who want to make a two-post or scissor car lift with their own hands is the complexity of manufacturing and the high cost of parts. It is almost impossible to create a long threaded shaft at home; selecting cylinders and hydraulic hoses is a complex matter, and they are not cheap.
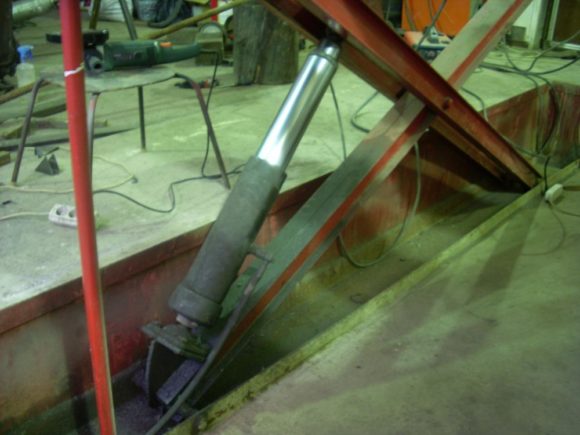
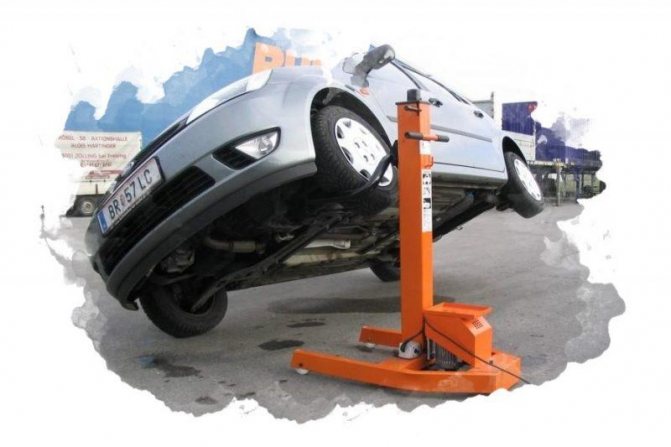
But there is a simpler version of the car lift, adapted for production in garage conditions, that turns the car on its side at an angle of 45°-60° and is called a tipper . Let's take a closer look at it and see what and how it can be made from.
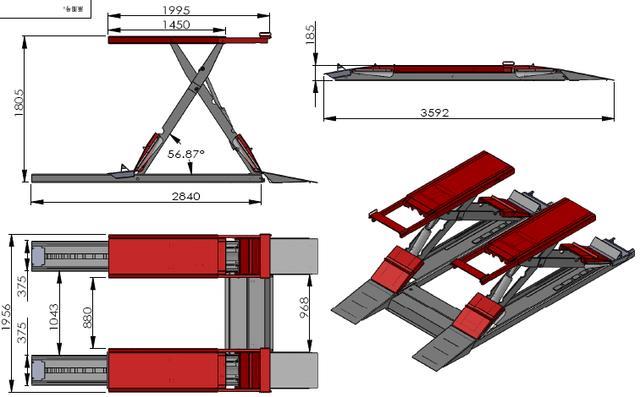
DIY scissor lift: pros and cons of self-assembly
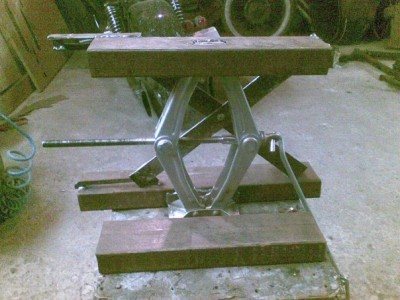
A scissor lift (or hydraulic table) is a device for lifting loads, consisting of a platform and a system of hydraulic cylinders and levers (the so-called “scissors”) that move the platform vertically.
Hydraulic scissor lifts have a very wide range of applications: construction, installation and finishing work, mechanical engineering, bridge maintenance, car repair - the devices are used to lift both loads and personnel. Scissor lifts used in production can have a lifting height of up to 25 meters and have a lifting capacity of 10 tons. But for individual use (for example, for lifting a car), a lighter design is sufficient.
With certain technical skills, you can make a scissor lift yourself. But it should be taken into account that it is not enough to have the necessary materials and prepare the tools; it is extremely important to correctly calculate all the design parameters of the lift. The calculation of a scissor lift includes determining the lifting height of the platform, calculating the beams and axes of the hydraulic cylinder, choosing a hydraulic cylinder, calculating the forces of the pumping unit and pumping unit. Not only the quality of the device’s operation, but also its safety depends on the correctness of all calculations, so even if you plan to assemble a hydraulic table yourself, it is better to contact special companies involved in design development. There they will help you not only calculate the hydraulic lift, but also produce accurate diagrams and drawings of the project.
Scissor lift
Prev 1
of
4
Next
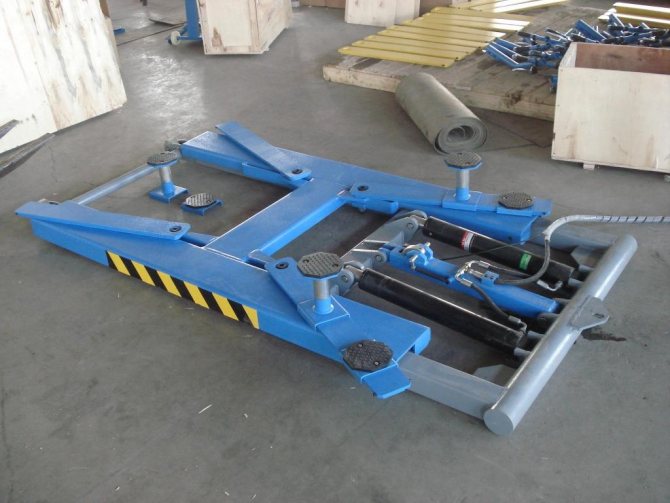
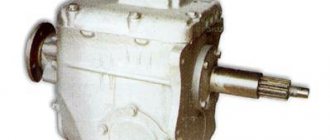
Lift assembly
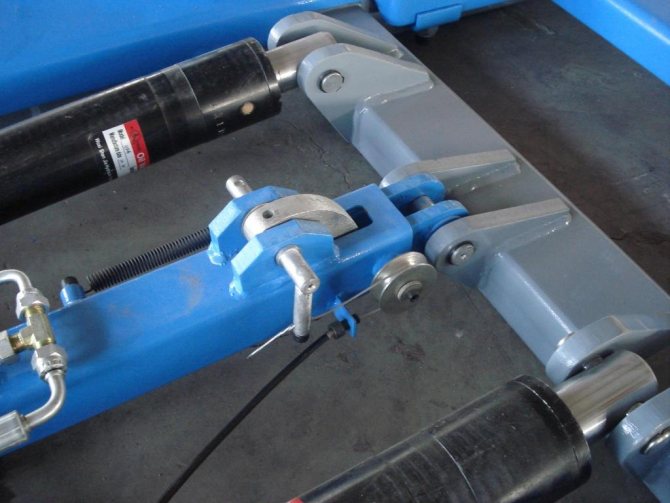
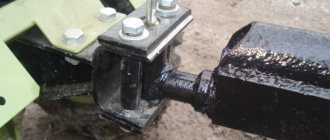
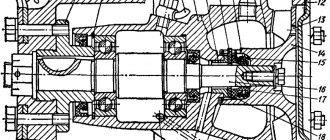
Traction unit design
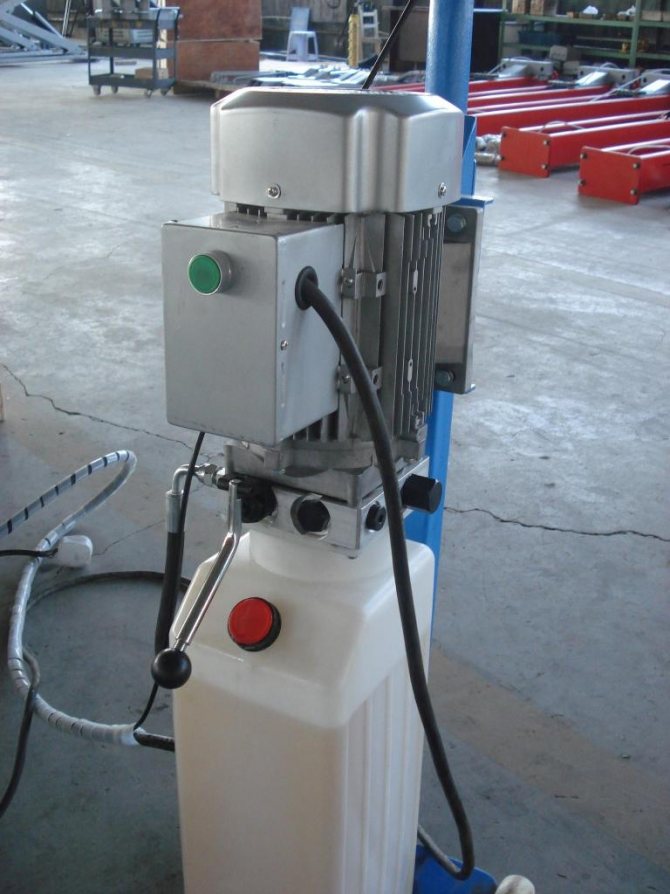
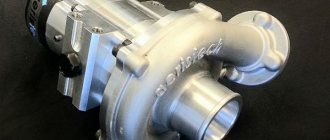
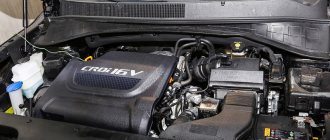
Pumping station
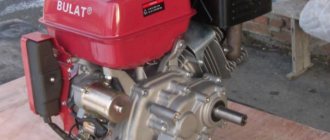
Rubber pads for shock absorption
Having completed all the necessary calculations, you can begin installing the hydraulic table. If you decide to assemble a scissor lift with your own hands, you will need hydraulic cylinders, a pump, bushings and a distributor into two sections. The base of the equipment and the platform itself can be made of metal channels (beams with a U-shaped section). For “scissors”, I-beams with an H-shaped section are more suitable.
Similar materials
Types, sizes, container volume 40 feet
Mar 2, 2018
Basic parameters, Euro pallet size
Mar 1, 2018
The design of a scissor lift assembled by yourself is no different from industrially assembled units. When assembling a homemade lift, you should not forget about safety. The safety of the factory mechanism is guaranteed by the manufacturer; in the case of self-production, there is no such guarantee. No matter how confident you are in the strength of the assembled structure, you should provide an insurance system against arbitrary folding of the device.
The hydraulic station for the lift must be equipped with an electric motor with a three-phase supply voltage of 380 V, with a power of 1 to 5 kW. Hydraulic cylinders are connected to it, driving the scissor arms and raising the platform. You can purchase a hydraulic station for a scissor lift either new or previously used - in the latter case, its price will be significantly lower. A new hydraulic station for a lift usually costs from 30 to 50 thousand rubles; the most budget models are manufactured in Russia or China.
If you plan to make a scissor lift yourself, you should adequately evaluate all the pros and cons of homemade assembly. Finding suitable parts can take a lot of time and effort; the total cost of the work may ultimately turn out to be even higher than the minimum prices for such equipment, and you should not forget about your own safety. Even a low lifting height creates a hazard for those working under the platform.
An alternative to DIY is to buy used equipment from auto repair shops or use other lifting devices such as cross beams or jacks.
Making a tipper yourself
How to make a lift in the garage with your own hands? The lift-tipper consists of several parts : the front pillar, the shoe, the platform, the upper, lower and rear beams and the connecting elements between them.
For manufacturing you need steel sheets 4 mm thick, angles, bushings, fasteners and tools for welding, cutting and drilling metal.
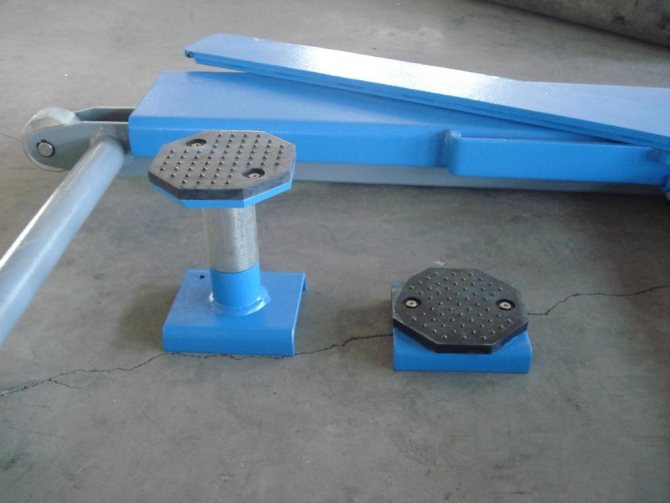
The first stage in the manufacture of a tipper is the shoe, which serves as a supporting surface for the jack. The shoe should be made of steel sheet as shown in the drawing, and it is very important to maintain the dimensions of the “eye” so that it moves freely up and down the front pillar.
itself is made of 32 angles, 1500 mm long, which are assembled into “squares” and welded. We will need two such “squares” connected to each other by segments of corners; the distance should be such that the upper beam can move between the “squares”.
In their lower part, make a hole for the support pipe, then you need to make several holes at certain intervals - they are necessary for the metal fingers that will fix the shoe and the upper beam.
The second stage of creating a tipper with your own hands is creating this beam and a platform for it. The platform is assembled from a steel sheet, the edges of which must either be bent to form a “box”, or its sides must be welded to the lid of the “box”.
In our case, the length of the platform is 350, width is 150, and depth is 20 millimeters. Inside the “box” you should put a piece of wood cut to its dimensions; it is fixed with fasteners inserted into pre-drilled holes in the side sheets of the platform. Rubber is attached to the top of the tree, an eye is welded to the metal below for fastening to the top beam and stiffening ribs - and that’s it, the site is ready.
Useful video
Here's a video about a do-it-yourself car lift for a garage.
Another video about a DIY garage lift.
Homemade cars, tractors, all-terrain vehicles and ATVs
DIY car lift.
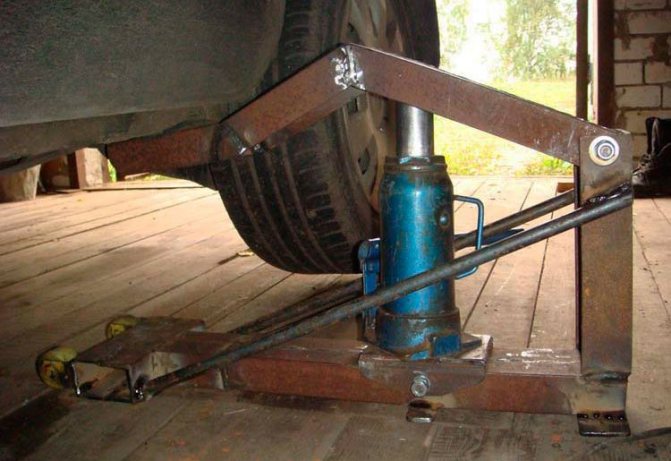
I had a hydraulic jack in my garage, it was tall, and you couldn’t put it under the car. And so I thought about how to adapt it. I found an idea on the Internet on how to build a pretty good jack.
True, the author made it from the 10th channel, but I didn’t have it on hand, but there was enough corner. I took the corners, welded them together, it looked like a channel. everything works perfectly.
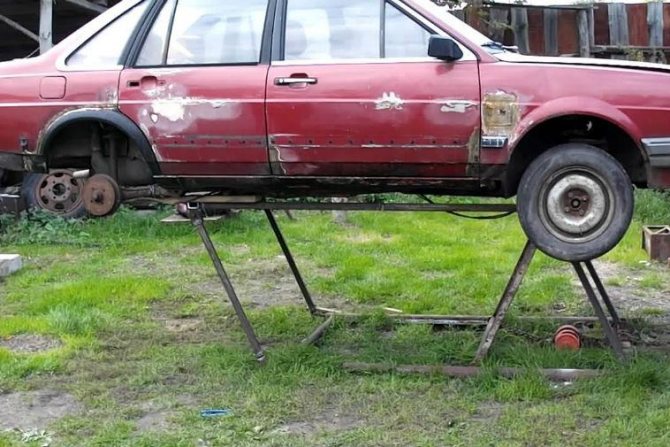
A homemade lift lifts a 12-ton car with a bang.
You can make a car lift with your own hands so that you can carry out maintenance and repair of your car yourself if there is no inspection hole. Not every pit can be equipped with a pit, so many car owners are thinking about making a lift themselves.
Despite the reliability and durability of the car, many of its elements are subject to severe wear and tear. It happens that the car does not start and you need to find out what the reason is. To lift the car yourself without external help, you cannot do without a lift. But the cost of car lifts is high, and not all drivers can afford to purchase one. Also, many drivers use the jack a couple of times a year. Therefore, to avoid unnecessary costs, it is better to make a car lift yourself.
Here we will tell you how to make a car lift yourself, and what you need for this.
Car lift diagram
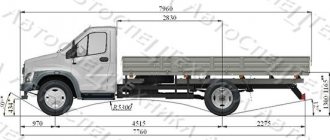
Before starting work, it is best to sketch out a diagram of the future product. The first step is to draw drawings of a channel base, the length of which is equal to the width of the pit (minus a few cm).
The height of the channel structure and its sides must be no lower than the jack used. The remaining details need to be planned and drawn based on these main parameters. It is important that the rollers attached to the side corners fit exactly into the corners of the pit. Another important point will be the precise fit of 40 mm square pipes into the 50 mm square guides welded to the side channels.
If you have experience in welding and manufacturing metal structures, then you will be able to independently make a convenient pit lift for your garage. This will help save your budget and make the product exactly to the parameters of your inspection pit in the garage.
Not every garage can have a viewing hole. But for vehicle repairs it is extremely necessary. Therefore, the best solution is to make a car lift with your own hands. This is not difficult to do if you have basic skills in working with basic mechanisms.
Types of car lifts
There are three types of lifting units for vehicle repair:
- Screw lifts.
- Chain mechanisms.
- Hydraulic devices.
According to the method of lifting the machine, lifts are divided into:
- Fork devices.
- Platform mechanisms.
- Scissor lifts.
The most common type of car lift is fork screw devices. Their base is a shaft made of tool steel that can withstand a force of several tons. But making such a device at home is almost impossible due to the complexity of the design of the plugs. Therefore, for self-production, it is better to use screw platform devices.
They are made in the form of two channels, located parallel to each other, and located with the ribs down, attached to screw drive devices, ensuring the lifting of the entire structure. In such units, the requirements for shafts are not too strict, since lifting is provided by four shafts instead of two. Their significant disadvantage is the need to use a jack to perform suspension repairs, since the car’s wheels are not suspended, but are located on channels.
Often platform and fork-type lifts for transport are produced with a chain drive. In terms of their parameters, they are no worse than screw ones, but they are much more complicated to manufacture; joint synchronous operation of electric drives and braking devices is required. To make scissor-type lifting devices, a hydraulic drive is usually used, but some craftsmen are experimenting with a screw and chain drive.
Kinds
You can find several of the following types of lifts on sale:
- Rack-mounted. The load is directed more towards the vertical post. The lower part is secured using anchor bolts screwed into the concrete floor. On the side of such a system there is a lifting mechanism, most often of an electromechanical or electrohydraulic type. There is also an additional fastening located there. Depending on the number of racks, they can be: single-post, two-post and four-post.
- The scissor tool is used for car maintenance and adjustments. The main advantage is installation at floor level. Thanks to the special design, they do not take up much space. Most often, lifting is carried out using a hydraulic drive. This guarantees low noise levels, smooth running and a long service life.
- The plunger is suitable for the maintenance of passenger cars and trucks. Available in several variations depending on the number of plungers. Provides convenient work with access to the car from any side.
- The mobile type is chosen by service station owners due to its versatility and easy maintenance. Their installation does not require a special prepared foundation. Easily installed in any room. The main advantage is mobility.
Homemade or factory made
The main problem faced by those who want to make their own lift for a vehicle is the high price of the parts. Therefore, it will be cheaper to purchase a used mechanism. Hydraulic cylinders with the required load capacity and sufficient length cost several thousand rubles. Custom made worms from special steel will cost about the same amount. As a result, the cost of building even a primitive scissor lift will cost 100 thousand rubles, while the price of new devices from China of various types is much less.
Safety and reliability
In addition to price, there are also factors that cast doubt on the independent production of a car lift - safety and reliability. Even a small car can weigh more than a ton. If the lift fails, the car will fall onto the person below. There are many such cases.
The lift may fail for the following reasons:
- The structural supports are poorly secured.
- The locking device broke because it was not designed correctly.
- The weight of the car turned out to be more than permissible, as a result the drive mechanism could not stand it.
To make a lift yourself, they usually take a ready-made design, hoping that its developer has correctly calculated the strength of the parts, or they make these calculations themselves. Such a project can only be completed by a qualified engineer, and an ordinary driver is not able to do it. Also, you need to calculate what load can be applied to the drive and brake mechanism.
If these calculations are not performed correctly, then such a lift becomes a lethal device. It is also important to correctly calculate the base of this structure. Here you need not only to pour the required layer of concrete, but also to make fastenings in the specified places.
Variants of car lift models
When deciding to manufacture a lift yourself, you need to select parts for it. You should start by looking for the drive mechanism and locking device. These parts can usually be found:
- At enterprises where there is old equipment.
- In stores selling various parts for equipment.
- At enterprises that update equipment.
- At scrap metal collection points.
To manufacture a car lift of this type, you will need two hydraulic cylinders of the required power and size, a compressor and high-pressure hydraulic hoses. The scissor-type car lift design is the simplest to manufacture, but it is difficult to make a reliable brake. Therefore, if the hose or hydraulic cylinder is damaged, a dangerous situation will arise.
Electric motors with gearboxes and shafts, which are necessary for fork lifts or platform lifts, can be quickly found where the old machine park is being replaced with a new one. It will cost significantly less compared to the price of turning worms. The stopper of this device also has a simple design - an oblique bar with a stopper is made of steel measuring 2 cm in thickness.
If you decide to make your own car lift, then before choosing a diagram it is better to see in practice what this device looks like, how it works, and whether it is safe. In this case, you risk not your car, but your own life. If there is another person under it when the car falls, then his life will also be at risk.
Option #1
The product will be fixed to the walls, so this device is used for repair work in garage conditions.
Required items:
- Three steel corners 7.5 x 7.5 cm.
- Worm type gearbox. Its minimum load capacity must be at least 300 kg, and its gear ratio must be at least 60 kg.
- Steel plate 10 mm thick. If you have an old machine used for metal work, then such a plate can be removed from it (the plate can be pulled out yourself).
- Bolts and nuts.
- Two metal chains, it is better that its links are at least 3 cm in diameter.
- Powerful hook.
- Steel cable with a diameter of 5 mm.
- 2 sprockets of different diameters.
Assembly order
- Fix the steel angles on the garage walls so that the car hood is lower in height.
- It is necessary to mount a steel plate on the corners of the lift and secure it with M8 bolts - 8 pieces. Since there will be no direct fastening of the plate and corners, the plate can be moved relative to the motor.
- Install the worm gear yourself.
- Attach larger sprockets to the gearbox drive shaft.
- Make a hole on the steel plate in the required place and insert the chain into it, then connect it into a ring.
- Install a smaller diameter sprocket on the gearbox output shaft.
- Make two holes in the plate for the second chain.
- Insert the second chain through these holes, throw one end of the chain onto the smaller sprocket, and fasten the hook to the other end.
- Assembly is complete.
DIY garage lift
For use in the garage, it is possible to make a kit for lifting a car with your own hands. You will need the necessary components, tools and plumbing skills.
A homemade lift is made using the following parts:
- Steel corners measuring 8x8x1 cm, for making a stable structure.
- Worm type gearbox. A new product can be expensive; it is usually selected during disassembly or removed from a non-working mechanism. It is necessary to pay attention to the load capacity, the indicator starts from 350 kg, the transmission force indicator is 60 kg.
- A steel plate with a minimum thickness of 1 cm is removed from old equipment.
- Set of bolts, mounting hook, star-shaped keys.
- Several iron chains with a link diameter of 2 cm or more. Weak chains will not withstand the load, you should pay attention to the quality of the product, some materials can stretch during operation.
- Steel cable, 5 mm thick.
Assembly cost
The lift is an expensive mechanism, either purchased or made independently, since all the parts are expensive. In practice, the best way to resolve the issue is to buy a used lift. Its service life allows it to serve many owners.
There are many different options, which allows each person to choose the right design. The lift can be used at any time if necessary, and work can be carried out to inspect the body, transmission elements and chassis. At the same time, significantly less financial resources will be needed.