Zig-zag
harrow
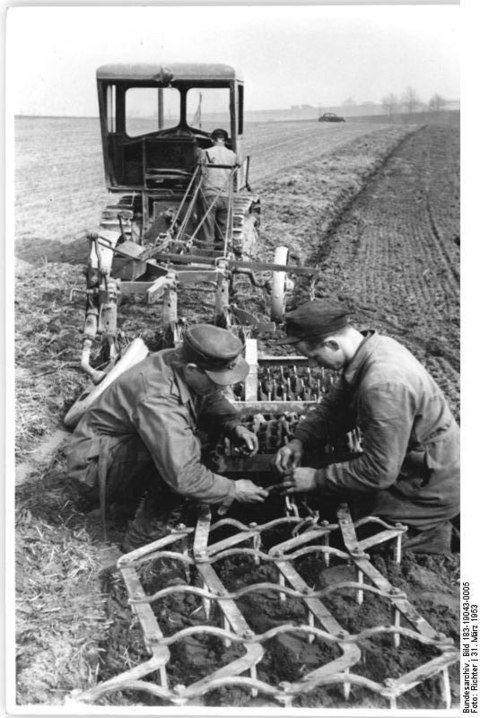
- an agricultural tool for cultivating soil[1]. Harrowing protects the soil from drying out, levels its surface, destroys the soil crust, and destroys weeds. They can be used both separately (for example, mounted with tractors on hitches) and in conjunction with other agricultural implements (ploughs, seeders, cultivators, etc.).
The oldest harrow was a knot harrow in the form of tied halves of short spruce logs with long knots[2]. It was used in the slash-and-burn farming system with manual tillage.
Harrows are divided into tine, disk and rotary; according to the design of the working parts, they are divided into tine, spring and disk, as well as into general and special purpose harrows[3]. Depending on the mass per tooth or disc, heavy, medium, light.
Disc harrow
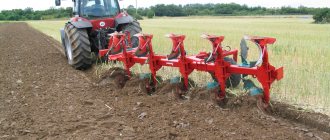
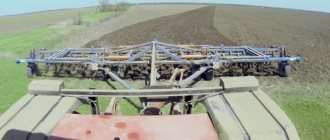
The working bodies of disc harrows are smooth or cut-out discs assembled into batteries [4]. The disk batteries are located at an angle to the direction of movement of the unit. During movement, the discs rotate and cut layers of soil, loosen it and mix it.
Disc harrows are used for peeling stubble after harvesting agricultural crops, caring for pastures and hayfields, and pre-sowing treatment of plowed land.
Special swamp and garden harrows are used to control weeds and cultivate row spacing. Batteries of garden disc harrows are equipped with special devices for their removal from tree trunks.
- Early 20th century
- “On the arable land. Spring" Venetsianov A.G. 1820s
- “Preparation of soil for sowing flax in the Vologda province” Pryanishnikov I.M. Second half of the 1880s
Popular models
On the domestic market of agricultural equipment, there are diskers designed to work with any tractors. This is how disk drives for MTZ-82 are classified:
- For light tractors.
Such models are designed for surface cultivation of the ground, to a depth of no more than 10 centimeters. The weight of the disker is about 800 kilograms for each meter of surface being processed. - For heavy vehicles.
This category is optimal for processing neglected areas, fields after planting sunflowers or corn. Diskator models performed well in regions with arid climates. Cutting elements are usually mounted on spring-loaded or double-spiral stands. - For super-heavy equipment.
Such models are used to treat large areas prone to soil erosion. In addition, the equipment copes well with processing turf fields with complex geometry and topography. The structural weight of the diskator varies between 1,200-1,400 kilograms per meter of covered area.
Among the popular models are two-row trailed diskers PM 4*2 PKS and PM 5*2 PKS. These modifications are suitable for working with tractors of 3-4 traction class, with power from 130 to 170 hp. With.
The number of installed discs varies from 26 to 32, which gives a coverage area of 4.8 m. The ground is opened to a depth of 15 centimeters; note that this parameter is adjustable, as is the angle of attack of the discs.
The semi-mounted model BDK-2.5 stands out in terms of its performance. This modification is optimally suited for deep loosening of the soil in drought conditions. The productivity of the unit is 3.5 hectares, at an operating speed of 12 km/h.
Please note that you can find a more modernized BDK-3.5 disker on the market.
This unit is used on difficult fields with a lot of vegetation. The productivity of the equipment is 4.2 hectares/hour.
Mounted diskers of the APN series are popular among Russian farmers. The design of such models includes a mulching roller, which forms a moisture-retaining layer.
Another distinctive feature of the equipment is a rigid frame with 11-12 discs (depending on the modification). The depth of tillage changes stepwise from three to twelve centimeters, which makes it possible to cultivate fields with stubble.
Please note that, depending on their intended purpose, diskers can be divided into garden and field. The first category is intended for work in orchards and vineyards.
Among the features we can highlight the asymmetrical arrangement of the cutting elements. The second group is suitable for cultivating large areas of land. To increase ground pressure, each field model is equipped with boxes for placing ballast weight.
TELL YOUR FRIENDS
Agricultural work cannot be done without the use of a functional harrow. It is impossible to carry out sowing without destroying the top crust of the earth and without digging up the soil to a loose consistency, thereby destroying all the weeds. That is why the presence of a disc harrow in every farm is an urgent need.
You can organize your own production of disc harrows at home if you have a garage, a welding machine and additional tools. Farmers are clients with good solvency. If you make your offer with a lower price but the same quality, then you can easily sell an expensive disc harrow unit. After all, this type of agricultural equipment brings large incomes to farmers.
Notes
- Harrow // Small Encyclopedic Dictionary of Brockhaus and Efron: in 4 volumes - St. Petersburg, 1907-1909.
- Leonid Vasilievich Belovinsky.
History of Russian material culture. - University book, 2003. - 432 p. - Harrow // Encyclopedic Dictionary of Brockhaus and Efron: in 86 volumes (82 volumes and 4 additional). - St. Petersburg, 1890-1907.
- ↑ 12
Agricultural Encyclopedic Dictionary / Editorial Board: V. K. Mesyats (chief editor) and others - M.: Soviet Encyclopedia, 1989. - P. 57-58. — 656 p. — 100,000 copies.
Hitches for Neva walk-behind tractors, their types, what for what
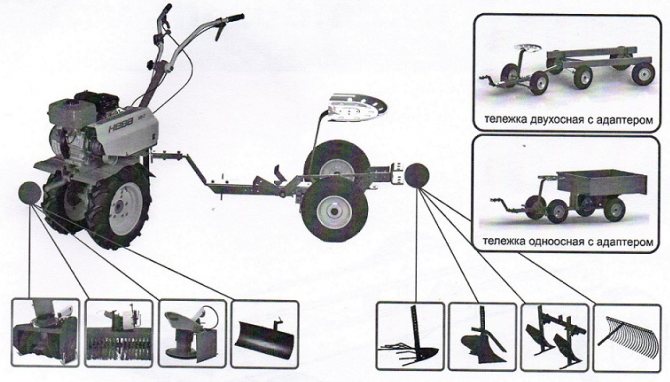
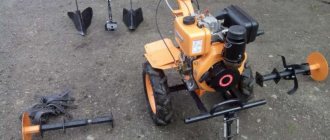
To operate any attachment with the Neva walk-behind tractor, it must be connected to the unit. There is a special device for this - a hitch. It comes in several types, let's look at the features of each of them.
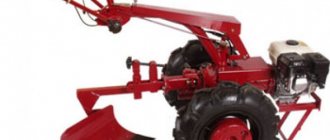
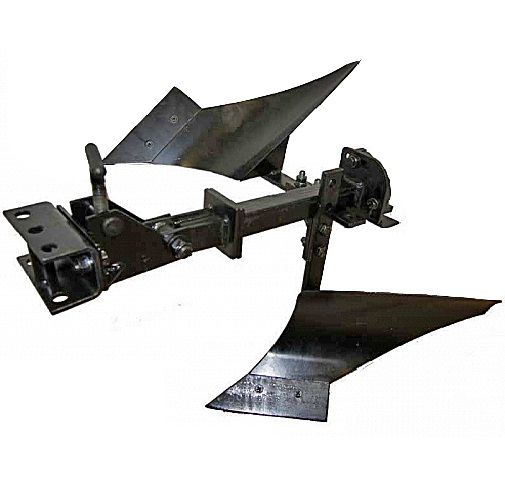
Hitch for the APM adapter (for working with a plow and hillers)
This hitch is designed to connect various attachments to the adapter. Such as plows, potato diggers and hillers. The design of the hitch allows you to securely fix the equipment to Neva walk-behind tractors using only three bolts.
Universal hitch
This type of hitch allows you to adjust the angle of the attachment using a bolt mechanism. This function allows you to tilt the Neva walk-behind tractor, and the plow will go perpendicular to the ground.
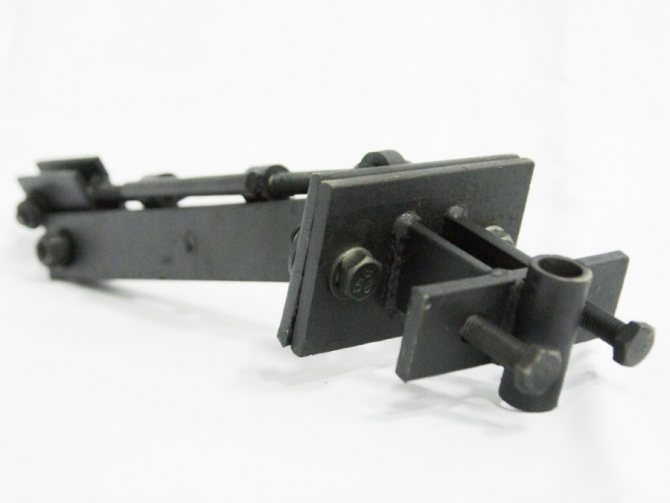
Since this hitch is mainly intended for the use of plows and hillers, it is possible to install a double or triple hitch so that several working elements can be connected to it at once.
Universal hitch N
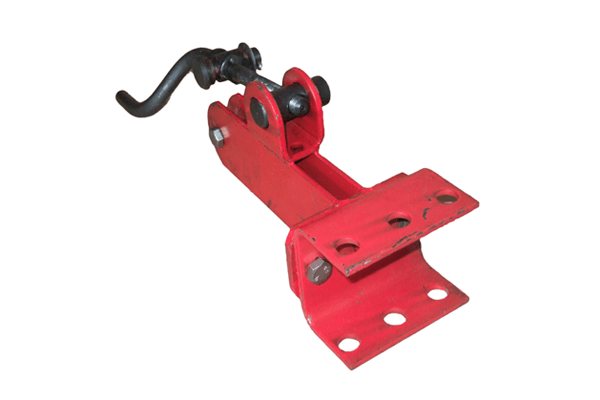
This is a modification of the universal hitch for the Neva walk-behind tractor. Its main difference is that you can not only adjust the height of the dive, but also change the angle of inclination in all planes. The maximum tilt angle in the horizontal plane is ± 20 °, and in the vertical plane ± 27 °.
MK hitch for working with hiller OH-2 and plow KROT
This coupling is special in itself, since it was produced exclusively for coupling with their ON-2 and Krot equipment. The factory thought out a separate type of clutch, which is not supplied in the kit, but must be purchased separately.
Read also: Kama walk-behind tractors
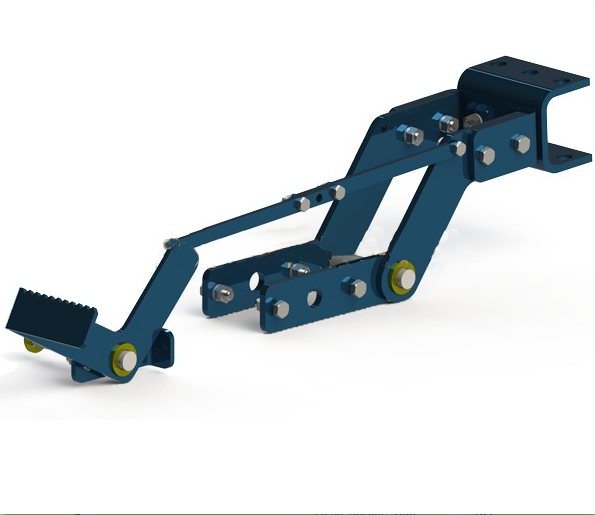
Is it possible to make a hitch for a walk-behind tractor with your own hands?
When making a hitch with your own hands, it would be most correct to choose a universal option, since 90% of attachments work with this type of clutch.
It is necessary to take into account that a lot of pressure will be applied to the coupling. Therefore, you should choose exclusively strong materials from large sheet metal.
The universal hitch is based on a U-shaped fastening. A square channel is best suited for its manufacture; it should be 40x40 mm in size.
Holes are made in this channel that will serve to fix the hitch with a pin. Therefore, you should initially make a pin from high-quality steel, and then drill holes in the mount to fit the size of the pin.
For further installation of attachments, the bracket must be connected. Its long part should be directed down or up so that the connected equipment does not interfere with movement. It should not be made too long to prevent it from touching the ground.
Owner reviews
Here's what people write on forums about the hitch for the Neva walk-behind tractor:
Stepan writes:
“I spent a long time choosing which hitch to use. After all, their device is similar. I thought about doing it myself, but I didn’t bother and bought a universal hitch N. It seemed to me that it is the most effective, versatile and compatible with all the equipment that I have. Plus there is an official guarantee. Since then there have been no complaints at work."
Vasily writes:
“I bought a Mole plow for work. Because it was one of the cheapest options, and I didn’t want to overpay. Still, they are similar and functionally the same. Imagine my surprise when at home I could not connect it to my hitch. The next day I went to the store to find out what the problem was. To which the seller told me that he forgot to mention the special coupling of this plow. I had to buy an additional clutch. Here’s the proverb that a miser pays twice, clearly...”
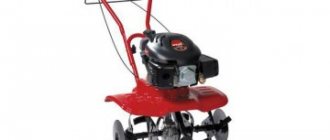
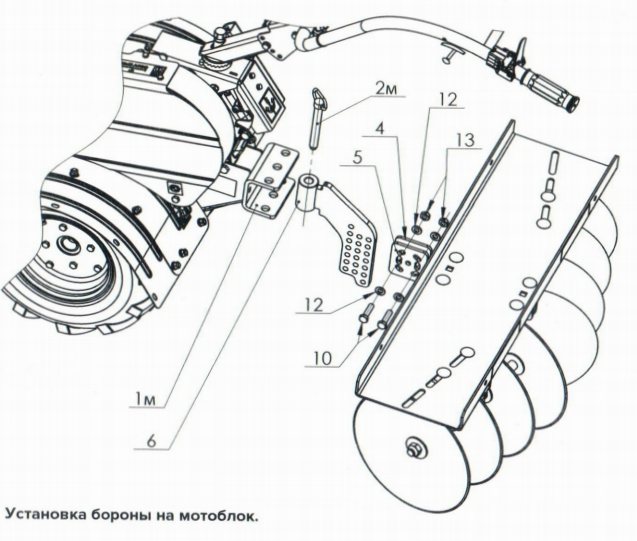
The harrow is designed to mix the top layer of soil (for uniform fertilization, moistening or aerating the soil) and bringing it into a homogeneous state (removes crust on the ground, breaks up lumps, removes weeds). One official harrow model is presented on the official website of the manufacturer of walk-behind tractors Neva.
Harrow BD 850M (husker)
The harrow breaks large pieces (blocks) of soil into smaller ones, thanks to which the soil additionally absorbs moisture and oxygen. These two factors are mandatory for growing crops.
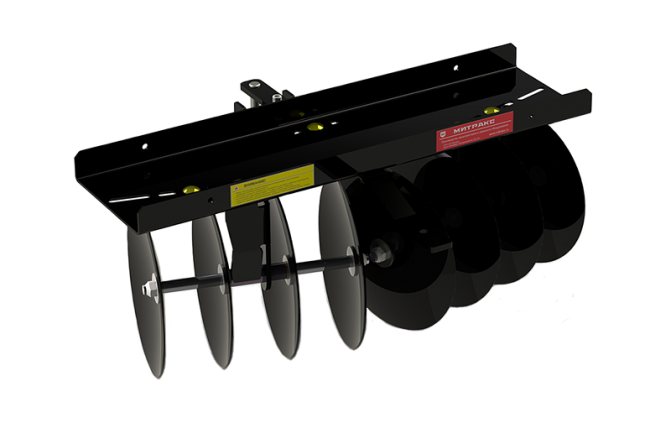
BD 850 is a disc harrow and is recommended for use in small or medium-sized fields. In this case, the width of the work can be adjusted from 70 to 96 cm.
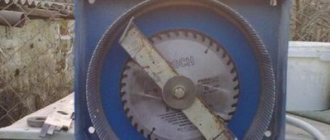
The harrow is equipped with 8 high-quality steel discs. They are replaceable and, if desired, old ones can be easily exchanged for new ones. The discs are sharpened at the factory using a special technology, thanks to which they do not become dull over a long period of operation.
Discs are installed on the axle. These axles are mounted on heavy-duty Teflon bearings.
The furrow angle can be changed depending on the conditions:
- An inclination of 10° is used for aggressive furrowing;
- An inclination of 15° is used for standard furrowing;
- An inclination of 20° is used for soft furrowing.
If hard rock is being processed and the discs slip, then a weighting agent can be used to sink them into the ground. For this purpose there is a special well-thought-out platform on top.
To achieve maximum furrowing results, two furrows can be used in series. In this case, the first unit dumps the earth inside, and the second outside.
It is also recommended to replace regular wheels with lug wheels.
Is it possible to make a harrow with your own hands?
If desired, you can assemble the harrow yourself; there is nothing complicated in this design.
The easiest way to make a toothed harrow. It is slightly less efficient than disk, but the device is much simpler.
All you need is a square tube, teeth and bolts.
It is necessary to cut the pipes and connect them to each other at an angle of approximately 30 °. And at the place where they connect, insert the teeth and secure them with bolts.
To connect to the walk-behind tractor, you can use a regular chain or make a coupling device using a regular metal pipe.
But this structure will often jump out of the ground; it needs to be additionally weighted with something. The ideal solution to the problem would be cinder blocks or any heavy metal structures. But you should not overdo it, since the connecting elements must support the weight of the entire structure.
Video review
The video demonstrates the manufacturing process of such a harrow: And here is a video of the harrow in action and the result of the work done:
What the owners say
Here are a few opinions from people who have already worked with harrows on Neva walk-behind tractors.
Alexey writes:
“I decided to make the harrow myself, since its design was intuitive to me. Therefore, after thinking a little and collecting information on the forums, I was able to do it without any problems. All that was needed were pins and pipes to attach them. Simplicity is the key to success)"
Literature
- Shangina I.I.
Harrow // Russian traditional life: Encyclopedic Dictionary. - St. Petersburg: ABC-classics, 2003. - P. 156-162. — 688 p. - Karatygin E. S.
Agricultural implements and machines // Encyclopedic Dictionary of Brockhaus and Efron: in 86 volumes (82 volumes and 4 additional). - St. Petersburg, 1890-1907. - Agricultural Encyclopedic Dictionary / Editorial Board: V. K. Mesyats (chief editor) and others - M.: Soviet Encyclopedia, 1989. - 656 p. — 100,000 copies.
- Harrow // Encyclopedic Dictionary of Brockhaus and Efron: in 86 volumes (82 volumes and 4 additional). - St. Petersburg, 1890-1907.
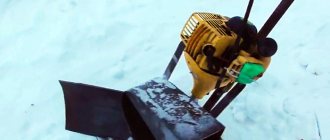
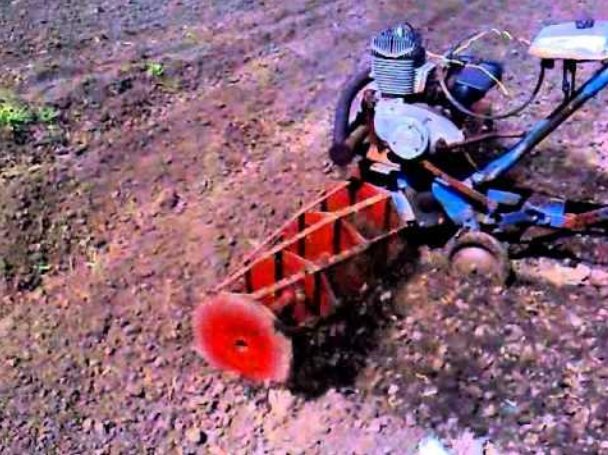
DIY tooth harrow
A homemade tooth harrow for a walk-behind tractor differs from a factory one in the quality of the material from which it is made. The factory model is made of structural steel that can withstand large and intense loads. Let's look at how to make your own harrow with the same properties.
A do-it-yourself tooth harrow for a walk-behind tractor can be made by any craftsman. This process is not difficult. The design is simple and does not have complex connections.
First, you need to design a harrow on a walk-behind tractor with your own hands with drawings that give an idea of the dimensions, connections and general layout.
The tool is made of steel strip, square pipe or angle.
The algorithm for manufacturing a dental device is as follows:
- Metal strips at an angle of 30° to each other are welded to the pipe from the bottom side. The edges should protrude evenly on both sides.
- A sleeve is installed in the middle by welding. Using a finger, the harrow is connected to the walk-behind tractor through the bushing. The lifting height should be adjusted by the stand for the depth of loosening.
- Teeth are installed on each edge of the steel strip using bolts or welding.
- A drawbar is mounted on the bushing.
- A screw is attached to the drawbar to adjust the position of the teeth. The front and rear tines should sink equally into the soil.
Experts recommend making the working elements of the harrow from hardened steel. It is better to make the teeth from corrugated reinforcing steel with a diameter of 10-14 mm and a length of 10-20 cm. The longer the teeth, the thicker they should be. They must be sharpened and hardened before attaching them to the frame, otherwise they will bend.
See » Do-it-yourself walk-behind tractor repair
A do-it-yourself tooth harrow for a walk-behind tractor is an excellent helper for small farmers and summer residents cultivating their plots.
Rotary harrow - pros and cons of the design
If harrowing with a walk-behind tractor is carried out on an area with virgin soil, or the use of the unit is planned to remove only the top layer of soil, then the use of a rotary harrow will be optimal. Despite the fact that the maximum processing depth with this equipment does not exceed 7 cm, this design is best suited for the purpose of primary cultivation of land in areas where grain crops were previously grown.
Read also: How to plant potatoes using a walk-behind tractor with a hiller, video
Rotary harrows for walk-behind tractors can be active or passive. Unlike passive structures, active harrows are mounted on a walk-behind tractor instead of wheels or rototillers are mounted on standard shafts of the unit. To increase the efficiency and productivity of the harrow, it should only be used in conjunction with walk-behind tractors that have high power and are equipped with gearboxes. These structures are best used in conjunction with other types of attachments - in this case, a harrow on a walk-behind tractor will not only loosen the top layer of soil, but also effectively level the ground on the site.
The advantages of rotary harrows for walk-behind tractors include ease of use, high efficiency and durability of these designs. Among the main disadvantages of this type of attachment, one should highlight the high cost, difficulty in making it yourself, as well as the cumbersome design.
Weights
Weights are used to add more weight to the structure. This is necessary in cases where the equipment “jumps” over the soil and operates intermittently.
Weights can be used both for the walk-behind tractor itself and for attachments to it.
Weights for the Neva walk-behind tractor
The official manufacturer offers to buy weights on its website. There are two types.
Read also: Diesel walk-behind tractor Patriot Boston
The first ones are made in the form of disks; they are designed to weigh down the wheels or axle of the walk-behind tractor. The discs improve the soil-clinging properties; the weight of one disc is 10 kg.
The latter are produced in the form of a cylinder, which is attached only to the pin of the walk-behind tractor. Thus, burdening its frame, the weight of one such cylinder is 17 kg.
But you shouldn’t buy a weighting material right away. After all, this is not an attachment. Its task is to make the structure heavier. Maybe you just have a cinder block, a metal dumbbell, or something else weighing about 10 kg at home? So just hang it on the walk-behind tractor, and the result will be the same.
But these manipulations should be carried out correctly, since otherwise there is a high risk of the weighting material falling off the mount and causing injury to a person.
Video reviews
Here is an example of how you can make and install a weighting material for a Neva walk-behind tractor yourself:
And this video talks about how to correctly install the disc weight directly on the wheels themselves for the Neva walk-behind tractor:
Owner reviews
Here are some comments from the forums about weights.
Igor writes:
“A problem has long been noticed that when working with hard soil, the walk-behind tractor does not catch on the ground, but slips, even with lugs. After surfing the forums, I found a solution: just add more weight. I didn’t buy a new one, but built it myself from scrap metal. The effect is amazing. Now I work without failures"
Vladimir writes:
“During the operation of the cutters, a problem was noticed; they did not dig into the ground, but slipped through. So I decided to make them heavier. To do this, I hooked weights from a barbell onto the wheels. Fortunately, they remain from younger times. The effect was noticed immediately."