Proper processing of potatoes with a walk-behind tractor
The main function of a motor cultivator is to loosen the top layer of soil without turning the layer over. Walk-behind tractors are more versatile, which allows them to use special mounted or trailed implements. Therefore, the walk-behind tractor is used to plow, loosen the soil crust, crush blocks after plowing, destroy weeds, level the ground, transport loads, etc.
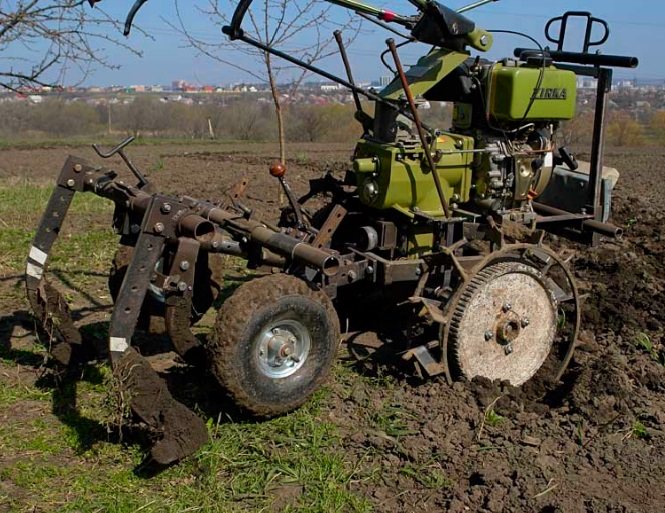
Plowing the soil for potatoes is the first job in the garden when spring arrives. After such treatment, the soil is enriched with oxygen, weeds are removed, and the planted crops grow more freely and actively. When the ground is plowed, the hardened dense layer of soil is destroyed, due to which the roots of the planted crops received moisture and oxygen well. Using a special plow or cutter on a walk-behind tractor, this operation is carried out without much difficulty.
It is very important to properly adjust the attachment before starting plowing. The first step is to check the grip of the plow. Then adjust the angle of the plow deepening. To do this, rotate the handle on the universal hitch. If the adjustment is carried out correctly, it will not take much effort to hold and direct the walk-behind tractor along the furrows. The depth of plowing the land with a moldboard is 18-19 cm. There is often no need to harrow the land after such plowing.
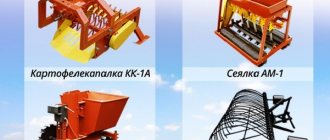
So that potato tubers, after plowing, can sprout freely, it is necessary to carry out harrowing. During this process, the top layer of soil is loosened, so that young seedlings receive more moisture and oxygen. The harrowing process carried out using an appropriate attachment is much more efficient and faster than when it is carried out using hand-held agricultural implements. To plant potatoes, use a potato planter-trailer or mounted potato planter.
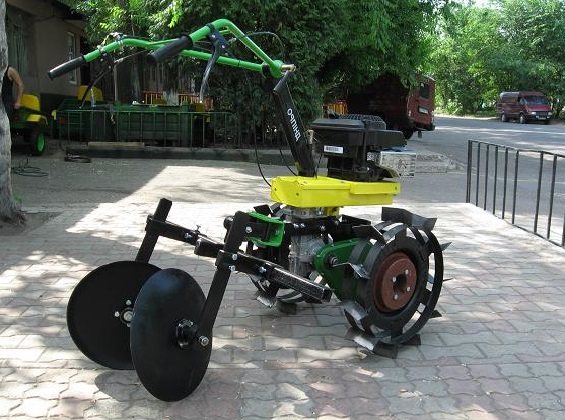
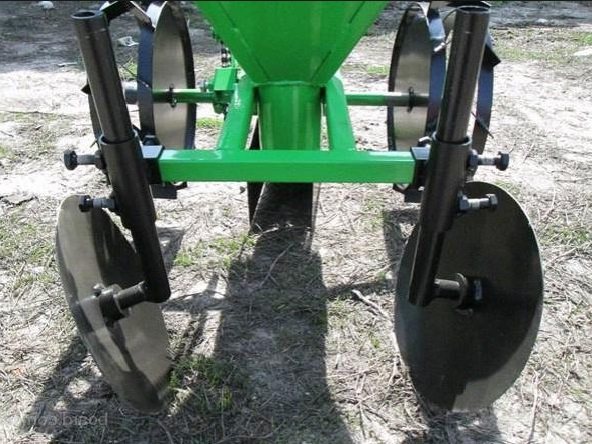
The potato planter for the walk-behind tractor is equipped with a special plow that digs parallel, uniform furrows to a given depth. At the same time, he spreads the potatoes evenly into the ground. Following this, special hillers cover the potatoes with soil.
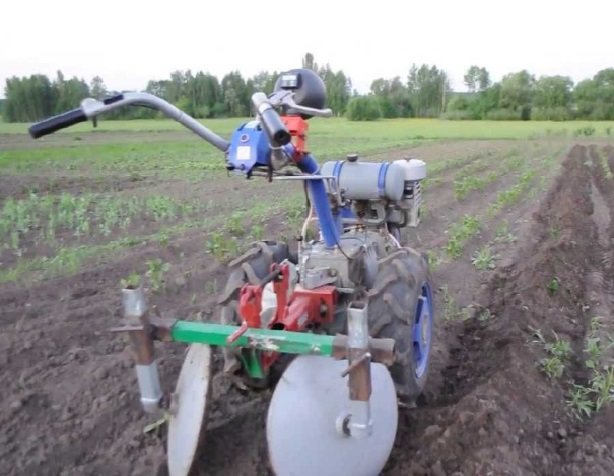
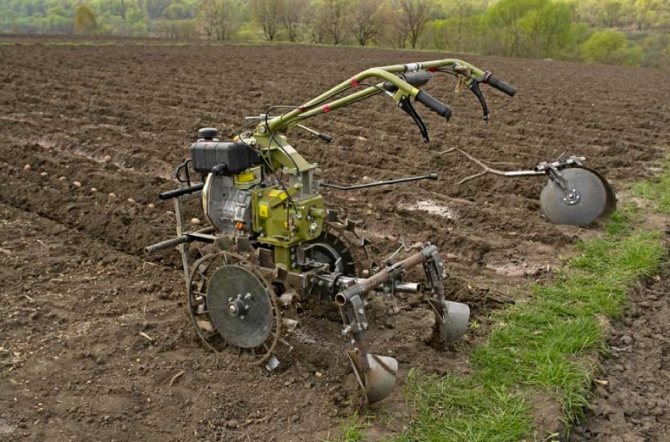
After the potatoes have sprouted and grown to a certain size, the field is divided into furrows. This whole process is called hilling. Thanks to him, it becomes possible to move around the field without damaging the sprouts. In addition, hilling retains moisture between the rows, removes weeds, and serves as protection against the first frosts. This is all done using a special attachment for a walk-behind tractor - a one- to three-row hiller.
The necessary fertilizers are applied during the hilling process using a special attachment. Typically, the device used to apply fertilizing is installed on a potato planter. In the fall they begin harvesting potatoes.
Potato tops are mowed using a walk-behind mower. Then they are raked and removed from the site. To harvest potatoes, they use a special attachment on a walk-behind tractor, which is a reinforced “shelf” made of iron rods, installed above a single-arm plow. When the walk-behind tractor moves, the earth falls between the rods, and the dug up potatoes move further, falling from above onto the ground. After this, the potatoes are collected in a trailer cart and taken to storage.
Types of cultivation
At different stages of plant growth, equally different types of processing are used, the technology of which differs significantly. Let's start with the most common use.
Inter-row
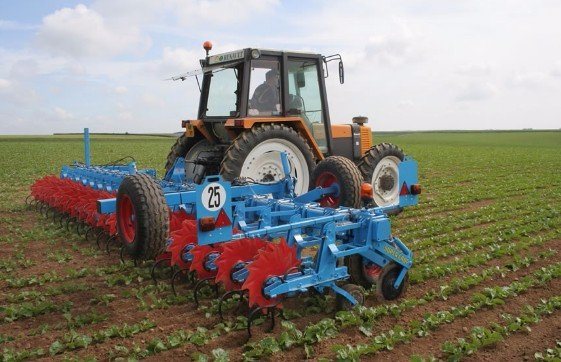
This operation, as the name indicates, is aimed at working between lines of planted crops. This is one of the main elements of productive processing, which is used on crops of potatoes, beets, vegetables and corn.
There are no special requirements for inter-row “boring”; such cultivation is carried out as the plantings grow, and the number of treatments is determined as necessary. If weeds grow too actively, and the soil is very compacted, treatment is carried out more often than on cleared loose soils (at a depth of up to 14 cm instead of the usual 12).
It can be combined with applying fertilizers or laying pesticides, cutting irrigation holes and caring for potatoes. In regions with wet soils, cultivation when working with root crops is traditionally combined with hilling.
Solid
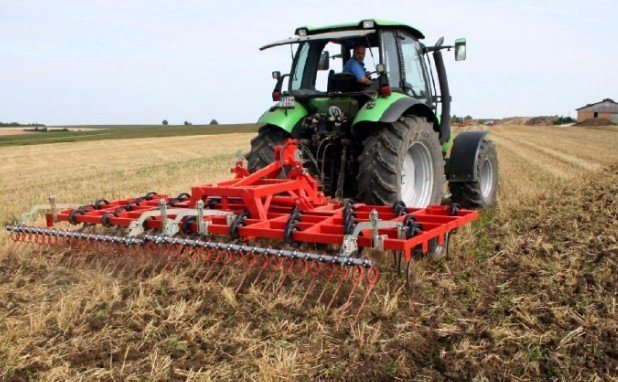
From the outside it looks simple - the unit goes through the entire section. Used for processing pure steam or areas allocated for plowing. Therefore, such cultivation is also known as pre-sowing cultivation.
Did you know? In Soviet times, some machine operators, in pursuit of high performance, resorted to a trick
- the ploughshare was placed at a shallower depth, which increased the speed of passage. This can be considered one of the signs of that time - in the pursuit of “shaft” and a rigid plan, quality was lost sight of.
In the spring, the layer of soil compacted during the winter is loosened, thereby providing “drainage” and air circulation. The first approach is made shallow - about 6–16 cm. The specific figure depends on the condition of the soil: in quickly drying fields they take it deeper.
Work with pure steam is carried out at depths of up to 12 cm; during repeated passes, the ripper is set to a maximum of 6 cm.
Immediately before sowing, the depth is taken at the level of the seeds (note that the soil will give a slight drawdown). When planning furrow sowing, the “paws” are deepened another 2–3 cm.
Both mentioned techniques do not seem so complicated, but their use is associated with a number of nuances that are worth considering separately.
Inter-row processing of potatoes with a walk-behind tractor
During the potato growing season, special care is required, which consists of loosening the soil between the rows. This process is called inter-row processing of potatoes. Since potatoes are a row crop, inter-row cultivation occurs by loosening the soil, or hilling. when loosening the soil is carried out regularly, this allows soil moisture to accumulate, destroy weeds and establish a complete air-food regime for the potato root system.
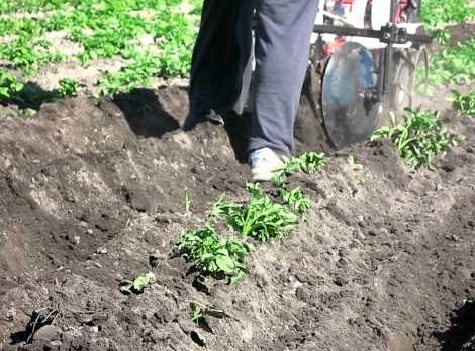
For better hilling, it is advisable to place potato rows at a distance of 70-90 cm. In industrial production, this width reaches 140 cm. With a larger width, deeper hilling is carried out.
Thanks to this, the potatoes do not get wet even during prolonged rains, which reduces the degree of damage by wet rot and late blight. Also, irreparable damage to the crop can be avoided during the summer drought. For the first time, potatoes should be processed 7-8 days after planting.
At this time, the soil forms a dense crust, preventing seedlings from appearing. Treatment is carried out twice before emergence, and twice after. On average every 5-7 days. Once the row spacing becomes inaccessible, processing is stopped. Interrow processing can be done either manually or mechanically.
Manual inter-row processing is carried out with a Fokin flat cutter. If potatoes are planted in small areas, you can cultivate the rows by hand. Loosening is carried out when the shoots have risen after rain or watering. For manual work, a hoe, a hoe and a rake are used. They also use the Fokin flat cutter because it is multi-functional and ergonomic.
Mechanical inter-row cultivation is carried out with a soil cultivator in the longitudinal direction. If the area is small, then walk-behind tractors are used. You can also combine fertilizing with inter-row cultivation if you use additional devices and attachments.
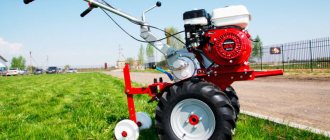
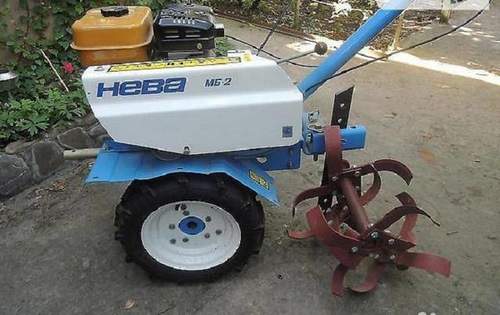
Working of the Neva Motoblock with a Mill Video
Mills are the main active element in cultivating land. There are several types. They are suitable for cultivating a certain land, and at a certain speed.
The choice of cutter affects how:
- how high-quality the final result of soil treatment will be;
- how much effort needs to be made for this purpose;
- what will be the maneuverability of the walk-behind tractor during cultivation;
- how the engine will be loaded.
First, the choice of cutter should depend on the duration of the project, what kind of soil will be processed, i.e. where, on what land does he work?
Cultivator cutters are an integral part of any walk-behind tractor. This is one of the first hanging accessories you should purchase.
But there are situations when the wrong cutter . For example, it does not fit the width of the surface being treated or does not penetrate deeply into the ground. In this case, buy additional cutters for the walk-behind tractor
Neva, who will be able to do the required amount of work.
Oh, this is how the land is plowed with a Neva walk-behind tractor with 8 cutters:
By changing the number of installed cutters, there is an option to improve the performance of the entire walk-behind tractor during cultivation, improve its maneuverability and the final result of loosened soil.
If you have to cultivate clay soil, then you do not need to install more than 2 pairs of milling cutters for cultivation. Because otherwise there will be a huge load on the walk tractor . And instead of a positive cultivation result, we will get a faulty engine. Moreover, the manufacturer does not recommend increasing the number of cutters when working with virgin lands, since the soil there has a lot of pebbles and other organic compounds.
Additionally, it is recommended to install cutters only when working with already prepared soil. Then cultivation with a Neva
with a cutter will bring a good result.
Plowing with a NEVA walk-behind tractor. 8 cutters, width 1.9/neva walk-behind tractor
How deep the cutters will penetrate into the ground depends on the adjustment set in advance, which is carried out using a plowshare. This is a metal anchor that is placed vertically at the cultivator coupling point.
READ What Oil to Pour into a Motoblock in Winter
A large immersion depth is characterized by the diameter of the cutter.
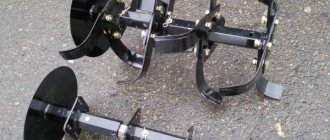
First of all, before making a purchase of a cutter, the question arises, what kind of cutters are they actually? At the moment, there are two types of cutters that are more popular:
They have their differences in purpose and form. Let's take a closer look at what their differences are?
This common rumor type is considered the standard option when conducting cultivation. Saber-shaped cutters have successfully passed the test of time and proven their effectiveness.
It is worth noting that the standard configuration includes a Neva
There is a specific myth about the type of cutters.
They have an impeccable shape.
The raw material at the production stage of saber cutters is high-quality steel with the highest carbon content. This metal is actually very strong. But to achieve even better density of the metal, it is additionally pierced and treated with high-frequency electronic current. Therefore, the final product is strong and reliable.
Prefabricated saber cutters. Since this steel is not susceptible to welding. Therefore, our client is left with connections made using bolts.
Oh, this is how cultivation occurs with the Neva
with saber cutters:
This model has been gaining popularity in recent years and is used on a par with “saber cutters”. It is mainly used for cultivating harder soils.
A distinctive feature is that this cutter
solid, not collapsible. This gives it additional strength and allows it to work with virgin lands and successfully fight a huge number of weeds.
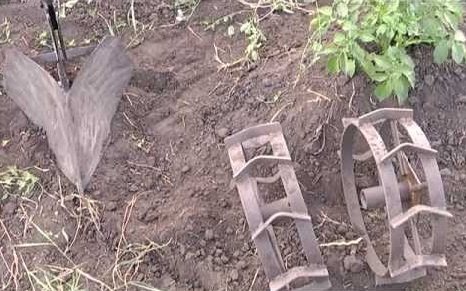
Walk-behind tractor\
In its standard form it has the following dimensions:
- length – 38 cm,
- width – 41 cm,
- height – 38 cm.
With such dimensions, the weight of such a plow is about 16 kg. And the highest tillage speed is 5 km/h.
The downside is the material from which the “Crow’s Feet” are made. This is ordinary carbon steel, the density of which is not high. And it often breaks or bends when working with excessive loads. Alas, in addition, with such strength, the plow is simply amenable to welding and future repairs.
READ Wheels for Grinders for Woodworking
Oh, this is how cultivation occurs using a Neva walk-behind tractor with a “Crow’s feet” cutter:
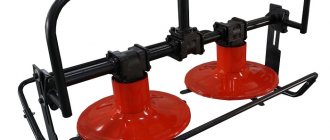
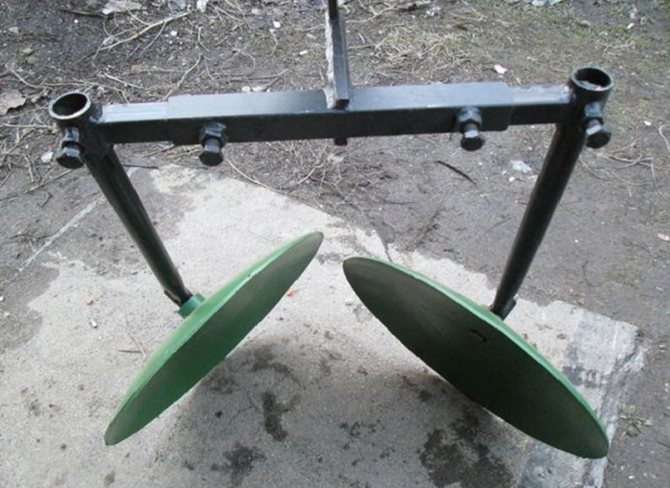
To ensure safe operation, a protective disk must be installed at the end of the cutter.
Thanks to it, you can clearly regulate the area of the treated surface and even prevent accidental cultivation of plants or flowers in the garden, or other crops.
The actual assembly diagram is easy, let’s take a closer look:
- The cutters must be installed in a counterclockwise direction. An advantage to note is the fact that they are self-sharpening. Therefore, no additional sharpening is required during cultivation; this will only harm them.
- Then you should lean the walk-behind tractor on the ploughshare and turn it at an angle of 45 degrees.
- Then you should make X-shaped blocks from wood, which will be about 50 cm high, and install the unit handle on them.
- The wheels are removed and the required number of cutters are installed in their place. If you have a powerful walk-behind tractor, you have the option of installing 6 or more cutters. If not, then it is not recommended to take risks with the installation of most parts.
Here is a video instruction on how to correctly assemble cutters for the Neva walk-behind tractor:
- You need to adjust the position of the handles. The main point here is to make it comfortable to hold and work with. Otherwise, you will get tired in a short time;
- A plowshare should be installed on the rear surface. It works like an anchor, provided the walk-behind tractor jumps over areas of land, which will help make cultivation more uniform;
- Start the Neva walk-behind tractor and let the engine warm up for 5 minutes;
- Shift into gear and drive to your work destination;
- When working with a piece of land, it makes no sense to stay in one place for a long time, you will get stuck in the ground;
- The main purpose of cultivation with a Neva
is to loosen the top layer of soil, therefore the ploughshare must be set to a low position; - The speed must be selected based on the situation. If in higher gears you notice that the cutters are slipping, then reduce the speed. If everything goes well, you can increase the speed a little;
- If the speed has been reduced, but he still jumps over sections of the ground, then try to lower him by pressing the handle. In this case, the ploughshare will go into the ground and slightly delay the progress.
- Raise the handle of the walk-behind tractor as high as possible. This will help in 90% of cases.
- If it is not immediately possible to raise the walk-behind tractor, then try to switch to reverse, and then lift it again;
- You will be able to experience shaking the walk-behind tractor from side to side. This also helps to remove the walk-behind tractor with the cutter from the ground.
READ How to Change the Coil on an Electric Trimmer Video
Oh, this is how cultivation occurs with the Neva walk-behind tractor:
Motoblock NEVA!!! Crow's feet cultivator.
On the global Internet, of course, there are many forums where people share their experiences on how to cultivate with a Neva walk-behind tractor with a milling cutter.
Oleg:
“Cultivation for me, as a farmer, is an integral part of working with the land. This is a necessary procedure that allows you to increase the amount of harvest. I’m on good terms with the walk-behind tractor, because at the moment I simply can’t imagine performing my functions without it. Thanks to him, this common rumor process occurs quickly and efficiently. To sell, you have to make physical efforts to operate the walk-behind tractor, but not without this in agricultural production.”
Stepan:
“I installed the cutters and happily went to my site. However, the work seemed very difficult at first. Cultivation happened slowly, awkwardly, and with a huge amount of effort. I was at a loss as to why this was so. I thought a lot and wondered what I had done wrong. It turns out that it was very important to lower the control handle lower. I rearranged it, and then the work went much easier.”