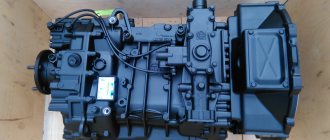
A vehicle often requires adjustments to various controls and systems. For example, you may need to adjust the clutch pedal, which greatly affects the quality of driving a car with a manual transmission. This adjustment is quite easy to do without visiting service centers, and does not require any special knowledge or tools.
When is clutch adjustment needed?
It is necessary to pay attention to the behavior of the car when changing gear. If, at the beginning of the movement, jerks or slight impacts are felt, or noise is heard when changing gears, then you need to check the free play of the vehicle's clutch pedal.
To do this, the engine starts and the clutch pedal is gradually released from the previously released state. If the car starts moving immediately after the pedal starts to be released, it will not have free play. If the pedal is released all the way, but the car does not move or begins to move only at the very end, then it means that the pedal travel limit has been exceeded.
Thus, if there is a violation of the clutch pedal free play adjustment, normal movement of the vehicle becomes impossible. Problems arise - you can’t get going, you can hear a crunching sound when changing gears, the car slips and has poor acceleration.
Diagnostics, adjustment and pumping of KamAZ clutch
Adjustment of the KamAZ clutch may be required during the operation of the vehicle, since this unit is subject to serious loads. If the clutch “leads” or “slips”, if there is extraneous noise and crackling noise when shifting gears, it is necessary to carry out diagnostics and the necessary adjustments.
Diagnostics and adjustment of the KamAZ clutch includes the following actions:
- Visual inspection of the clutch drive.
- Adjusting the free play of the clutch pedal.
- Adjusting the free play of the release bearing clutch.
- Adjusting the full stroke of the clutch pneumatic hydraulic booster pusher.
- Bleeding the clutch hydraulic system.
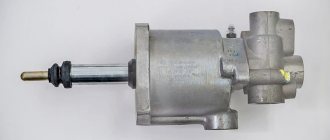
The clutch drive of Kamaz-5320 vehicles includes a clutch pedal with a release spring, a master cylinder, a working cylinder assembled with a pneumatic booster, pipelines and hoses for supplying working fluid from the master cylinder to the pneumatic booster, a compensation tank connected by a hose to the clutch master cylinder. Before any clutch adjustment, the drive should be inspected:
- Check the clutch drive for leaks. To do this, press the clutch pedal two or three times. A strong air leak is detected by ear, and a weak one is detected with a soap solution. Brake fluid leaks are checked visually. If a drive leak is detected, it is eliminated by tightening or replacing leaking elements.
- Check the fluid level in the clutch compensation reservoir. The fluid should be 15...20 mm below the edge of the reservoir neck. If necessary, add liquid to the required level. Mixing liquids of different brands is not allowed.
- Check the action of the release springs of the clutch pedal and the clutch fork shaft lever
- Tighten the bolts securing the pneumatic clutch drive booster. Tightening torque 90… 100 N*m (9…10 kgf*m)
- Drain condensate from the pneumatic hydraulic booster
If the clutch drive is mechanically in good condition, the necessary adjustments are made according to the set values.
The free play of the clutch pedal, corresponding to the start of operation of the master cylinder, should be 6...15 mm. Measure the free play of the pedal with a graduated ruler, which is pressed against the floor of the cabin at the level of the middle of the pedal platform. If the free play exceeds the specified limits, adjust the clearance between the piston and the master cylinder piston pusher.
Read more: How to wash a car engine yourself at home video instructions
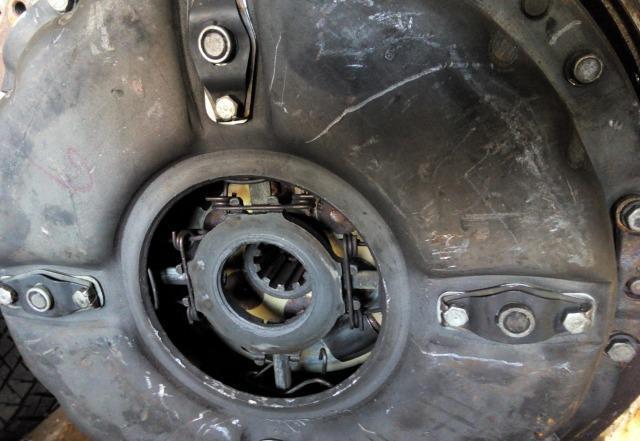
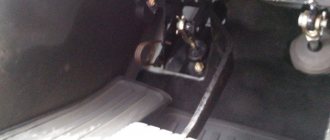
To adjust the clutch pedal, set it to its highest position and, having previously uncottered and loosened the castle nut, turn the eccentric pin that connects the upper eye of the pusher to the lever so that the movement of the pedal from the upper stop until the pusher touches the piston is 6...15 mm, after which tighten and cotter the castle nut.
The full travel of the clutch pedal should be 185... 195 mm. It is adjusted by changing the position of the movable stop 4 located in the upper part of the pedal (see Fig. 2.23, i), after which the stop is fixed with a lock nut.
The free play of the clutch release clutch should be 3.2...4.0 mm, which corresponds to the free play of the clutch fork shaft lever of 4...5 mm.
The free play of the clutch release clutch is checked by manually moving the lever with the spring previously disconnected.
Adjust the free play of the fork shaft lever with the spherical nut of the pneumatic booster pusher, and then connect the spring to the lever.
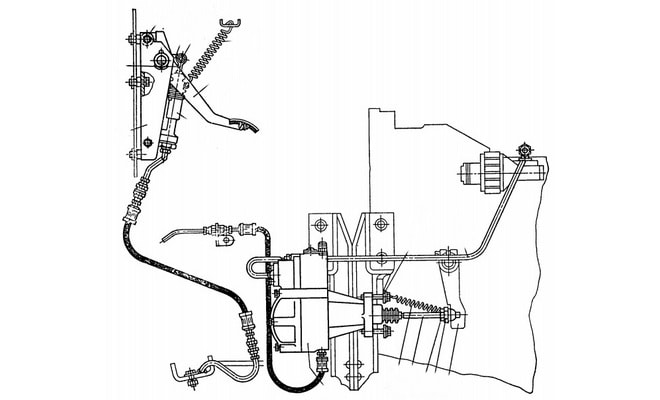
The full stroke of the pneumatic booster pusher must be at least 25 mm. With a smaller stroke value, complete disengagement of the clutch is not ensured.
The full stroke of the pneumatic booster pusher is checked by pressing the clutch pedal all the way.
If the pusher travel of the pneumatic booster is insufficient, check the free travel of the clutch pedal and the fluid level in the clutch master cylinder reservoir again. If necessary, remove air from the hydraulic system.
Two people are required to bleed the clutch hydraulic system. Before starting work, clean the rubber protective cap of the bypass valve from dust and dirt, remove it and put a rubber hose on the valve head.
The free end of the hose is lowered into a glass vessel with a capacity of about 0.5 liters, filled to 1/3... 1/4 of the height with working fluid. By sharply pressing the clutch pedal 3...4 times and holding the pedal in the pressed position, unscrew the bypass valve 1/2...1 turn.
The presence of air in the hydraulic system is indicated by the release of air bubbles from the working fluid flowing through the hose into the glass vessel. After the liquid stops coming out when the pedal is pressed, close the bypass valve.
In this case, it is necessary to monitor the level of working fluid in the master cylinder reservoir, which should be no lower than 40 mm from the top edge of the reservoir.
The procedure is repeated until the release of air bubbles from the working fluid flowing through the hose into the glass vessel stops.
Next, having screwed the bypass valve all the way, remove the hose from it, put on the protective cap and add working fluid to the master cylinder reservoir to the normal level.
Drained brake fluid can be reused after it has settled for complete air removal and filtration. The quality of pumping is checked by the full stroke of the PSU pusher.
KamAZ PGU clutch drive
- Visual inspection of the clutch drive.
- Adjusting the free play of the clutch pedal.
- Adjusting the free play of the release bearing clutch.
- Adjusting the full stroke of the clutch pneumatic hydraulic booster pusher.
- Bleeding the clutch hydraulic system.
KamAZ PGU clutch drive
How to determine the amount of free play?
Determining the amount of free play is carried out using a ruler or caliper, the main thing is that they fit in size:
- A clearly visible object with a sharp end, for example, a match, is attached to the middle of the pedal sole. This is done in order to facilitate the measurement process.
- The ruler is installed in the plane of movement of the pedal support pad so that changes in the location of the latter can be easily monitored using the scale marked on the ruler.
- Lightly press the pedal with your hand, and then carefully move it until a sharp jump in resistance to the force occurs. After this, use a match to mark the distance traveled by the pedal in millimeters.
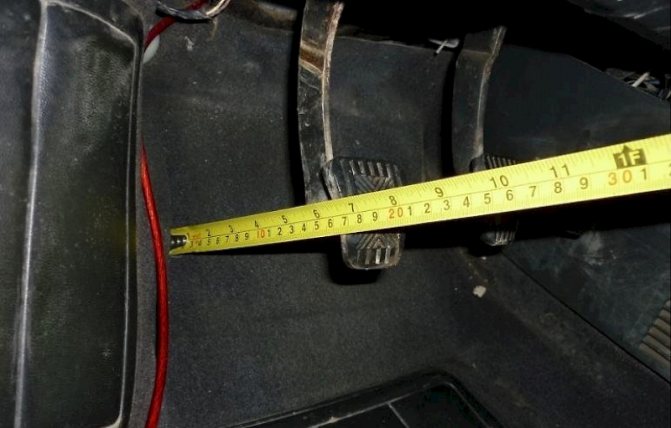
After receiving the measurement results, it will be possible to determine whether the clutch pedal requires adjustment or whether it can be done without it.
Reference! For different car models, the value of this indicator will be different. For example, for a VAZ-2101 it will be 35-40 mm, and for modern class B cars this parameter should be in the range from 5 to 14 mm.
Thus, the specific amount of pedal travel for a certain type of car must be checked in the operating manual (the so-called “Murzilka”).
How to adjust the pedal free play?
Content
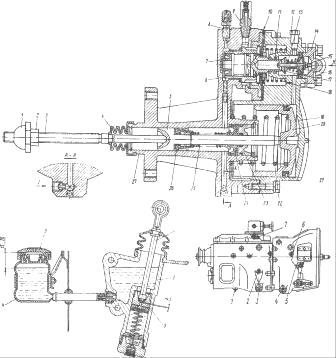
[ To uncover]
[Hide]
Model 17 clutch
To adjust the gap, unscrew and loosen the castle nut of the eccentric pin (see Fig. Adjusting the gap) and, by rotating the eccentric pin, set the required free play of the clutch pedal.
remove plug 5 from the tank and fill the tank with working fluid to a level not lower than 15-20 mm from the top cap of the tank filler neck;
remove the cap from the bypass valve (see Fig. Bleeding the clutch), place a hose on the valve head, the free end of which is lowered into a transparent vessel with working fluid;
unscrew the bypass valve ½-1 turn and sharply press the clutch pedal all the way to the pedal stop until air bubbles stop emitting from the working fluid;
during pumping, add working fluid to the system, not allowing its level in the tank to drop below 40 mm from the upper edge of the filler neck;
at the end of pumping, with the pedal pressed all the way, screw the bypass valve all the way, remove the hose from the valve head, and put on the cap;
After bleeding the system, add fresh working fluid to the tank to the normal level.
The quality of pumping can be determined by the full stroke of the clutch pneumatic booster pusher (see Fig. Bleeding the clutch). If the fluid level in the master cylinder is normal and there is no air in the fluid, then the full stroke of the pusher should be at least 25 mm. To measure the full stroke of the pusher, press the clutch pedal all the way.
It is worth noting that shock absorbers are used not only as additional suspension elements that improve comfort. The correct choice affects safety, handling, braking distance and speed performance. Do not neglect the diagnostic services of specialized service centers and adhere to the regulated maintenance and replacement periods.
At this stage of development of the auto industry, car owners have to deal with the replacement of shock absorbers and their repair. There are a huge number of places where you can buy car parts. Car owners have a wide choice of different shock absorbers.
It is necessary to choose the right shock absorbers for your car. But this is not easy to do, since there is a wide range of companies on the market that produce different shock absorbers, including many different characteristics, properties, types and types.
Read more: Tinting film for tinting car windows
The most popular shock absorber manufacturers: SACHS, KYB, MONROE, Koni, Bilstein, Boge, TOKICO (HITACHI), Al-KO, DELCO, Fenox, Fox, Plaza, Bilstein, SAAZ, LYNXauto, ZEKKERT, RANCHO, PATRON, AMD, Arirang, Asam, Finwhale, Miles, Ashika, Stellox, BORT, Mando, Avantech, KORTEX, SAT, FEBI, Optimal, PILENGA, PARTS-MALL, TRIALLI, Japanparts, TRW.
The seller, as a rule, always has one goal - to sell. In order for the buyer to return, the seller focuses on opportunities and acts according to the following scheme:
- offer the most popular brands;
- offer the cheapest or most expensive;
- focus on the product that is in stock;
- make a choice regarding the buyer’s price category;
- motivate the buyer by the fact that these are the shock absorbers that are installed on his car from the factory.
Despite this, the buyer himself can determine and select the spare parts that are suitable for him, having the necessary knowledge. So which ones are better, gas or oil? Let's try to understand this complex issue and give comprehensive answers.
Types of shock absorbers
To correctly select the right parts, you do not need to be a car mechanic and have knowledge of all the mechanisms in the car. Shock absorbers are an important spare part and you don’t want to change them often, so you need to choose exactly what suits the technical characteristics best.
The following types of shock absorbers exist:
- single-pipe gas;
- two-pipe oil;
- two-pipe gas;
- gas with an external chamber;
- shock absorbers with automatic electrical adjustment.
Depending on the operating conditions of the car, the most appropriate type is selected.
These shock absorbers are gas-oil shock absorbers, filled with hydraulic oil, with gas support, the working fluid is hydraulic fluid. Mainly used for sports driving. They help to achieve maximum stability of the car on the track by increasing its grip characteristics with the road surface, increasing the rigidity of the suspension as a whole, while, of course, comfort is lost.
They maintain a constant high gas pressure. As a rule, the service life of these shock absorbers is long, but they are demanding on the quality of the road surface.
Gas under excess pressure (for example, nitrogen) passing through the bypass holes from one chamber to another impedes the movement of the rod, while the hydraulic oil poured into the shock absorber does not foam; a specialized valve is responsible for the rebound and compression stroke.
The most common system for assembling valves on a stem is the herringbone. Valve washers are selected from smaller to larger gradually, in increasing order. Thus, at the beginning of the shock absorber stroke (on small bumps) we have slight damping, but on large bumps large washers come into play and the suspension begins to work progressively. Thus, failures in operation disappear and stability is ensured.
These shock absorbers are oil, with the exception of pneumatic ones, which are rarely used in the civilian version, without gas support.
Operating principle: the role of an expansion tank is performed by an external pipe; when the piston is lowered, the liquid in the external pipe rises, unlike single-pipe ones, in which compensation of the hydraulic fluid occurs due to a floating piston and gas pressure.
The oil bypass channels are larger in diameter, due to this there is less foaming and there is no need to compensate for the formed foam, as a result we get the most comfortable and soft ride, the car is more impressive, not fussy about the surface and quality of the roads.
The larger the diameter of the holes in the bypass valve, the less oil resistance the piston faces and the piston works easier - the shock absorber becomes softer. If the diameter of the holes is smaller, the stroke becomes stiffer accordingly.
They were mainly used on now outdated cars. Unfortunately, comfort and controllability are difficult to compatible things, so the use of oil shock absorbers is not suitable for active driving.
The oil shock absorber, which has the advantage of an affordable price, is designed for simple operating conditions. This type has a number of disadvantages: overheating of the oil due to slow cooling until the oil boils, frequent replacement of damping elements.
They are gas-oil shock absorbers - a combined type of shock absorbers, created to combine all the positive characteristics of single-tube and double-tube shock absorbers. They are resistant to elevated temperatures due to better cooling and contact of the hydraulic fluid with the second tube.
Operating principle: Pressurized gas, instead of air in the outer cylinder, prevents oil from foaming inside the shock absorbers, which improves performance. In this position, the piston is pressed with gas; when overcoming bumps in the roads, the rigidity changes nonlinearly. The choice of such shock absorbers is necessary for those who prefer active driving.
It is worth considering that the price category of these shock absorbers is slightly higher than conventional oil shock absorbers; they will cost car owners approximately 15-20% more.
These shock absorbers use a remote chamber. Remote chamber - designed to increase the volume of oil and gas, with the same overall dimensions, which allows you to increase the stroke of the rod, install additional hydraulic valves to flow hydraulic fluid from the working chamber into the remote chamber and counteract the operation of the piston.
Article on the topic: Anticorrosive application technology
It is possible to set various adjustments for the stiffness and rebound of the rod; in some models, you can adjust the height of the shock absorber and even the ground clearance of the car.
Such products require more careful care and maintenance. Mainly used in sports. The Russian racing team KAMAZ-master, a multiple winner of the Dakar, uses shock absorbers with a remote chamber because there is a need for careful suspension settings for different types of tracks, weather conditions, and speed limits, which together allows you to save precious minutes of time.
Such shock absorbers are not installed on production cars because They are tuning components for sporty and aggressive driving. And the cost will not be cheap for car owners.
They use hydraulic oil and gas, but in automatic modes. Automatic, electrical adjustment is the newest type. With this adjustment, there is no need to leave the car to adjust the shock absorber.
A hydromechanical adaptive system with an additional valve, together with various sensors, is capable of determining the vibration frequency of the suspension, analyzing the data, driving style, determining how much it is necessary to open or close the bypass valve, making the shock absorber softer or stiffer. In some cases, you can manually select operating modes.
On a flat surface, the shock absorber does not lose rigidity, which allows you to quickly take turns, and on bumps and paving stones, the valves in the shock absorbers open, providing softer suspension operation to improve ride comfort.
Adjusting the free play of the clutch pedal
Clutch drives can be either cable or hydraulic. Therefore, their adjustment is carried out in various ways.
Adjusting the drive with a cable
If the clutch in the car is mechanical, it is necessary to adjust the cable (cable drive). To do this, you need to get to the adjusting bolt located in the engine compartment. First, unscrew the lock nut, and then begin to rotate the adjusting nut. The result is checked with a new amplitude measurement (after pressing the clutch pedal 3 times).
The adjustment itself is carried out as follows:
- Using measuring instruments, they find out what distance separates the clutch release fork from the end of the damper. It should be no more than 8.6 cm. In this case, the error should not be more than 5 mm, either in the direction of increase or decrease.
- Find the distance at which the cable tip is located from the end of the damper. This figure should be about 6 cm, with the same error as in the previous case.
- If the distance does not correspond to normal, the cable is adjusted using an adjusting nut, which is turned in one direction or another until the desired result is achieved.
- Ultimately, the clutch pedal is pressed several times, and then new distance measurements are taken. If necessary, adjustments are made again. After this, the locknut is finally tightened.
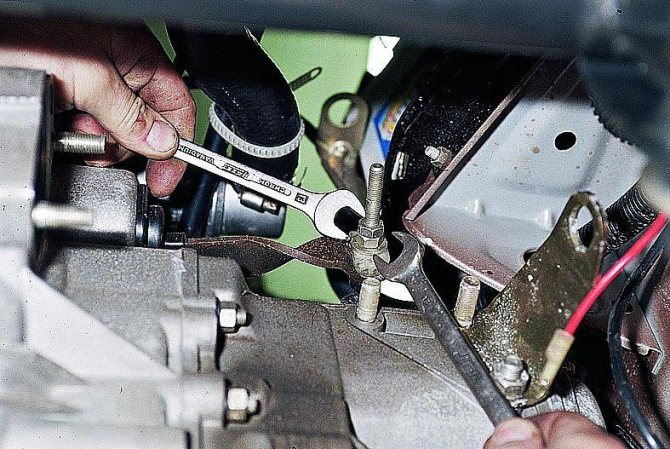
In a garage environment, this is not as difficult to do as it might seem to a beginner. All you need for this is to purchase a spare clutch cable, as well as a set of keys and screwdrivers. To begin, remove the plastic parts of the car floor in the area of the pedals. This is necessary in order to have easy access during repairs to the place where the cable is connected to the pedal.
Then you need to perform the following manipulations:
- The tip of the clutch cable is disconnected from the release fork.
- Then I pull out the cable sheath damper from the mount, which is located in the gearbox housing.
- After this, the cable tip and the clutch pedal are disconnected.
- Pull out the clutch cable.
Adjustment - free play - pedal
Adjusting the free play of the clutch pedal and I.
Adjustment of the free play of the clutch pedal (which is 30 - 50 mm for most domestic cars) is carried out according to the gap (1 5 - 4 mm) between the ends of the levers and bearings of the clutch release clutch by changing the length of the pedal rod, rotating the nut or fork of the rod. When servicing clutches in which the disks are compressed by a central spring, adjusting the pedal free play is preceded by adjusting the spring compression force. For hydraulically driven clutches, the free play of the pedals is additionally adjusted by changing the gap between the pusher and the master cylinder piston.
Adjustment of the free travel of the clutch pedal with a mechanical drive (Fig. 4.2) is carried out by changing the length of rod 2, which connects the pedal axis lever to the release fork. For most trucks, this adjustment is performed without disconnecting the linkage from the drive parts. It is enough just to unscrew or screw the nut / on the rod.
| Clutch release drive for GAZ-66 car.| Clutch release drive. |
Adjustment of the free play of the pedal of GAZ-21, GAZ-24, KAZ-608 cars, RAF-977DM, PAZ-672, LAZ-695E, - 695N, - 697E buses is carried out similarly to the clutch of the GAZ-66 car.
Adjustment of the free play of the pedal of M-20 and GAZ-51 cars is carried out in the following order. Slowly pressing the pedal, determine the amount of free play. Place the pedal in place. The position of the connecting rod is adjusted so that when the piston is in the extreme forward position, the axis of the rod hole does not reach the axis of the holes in the pedal lever by 1 5 - 2 5 mm.
To adjust the free travel of the pedal, remove the release spring 4 (Fig. 311) and turn the lever 3 so that the stroke of the lever at the end (near the working cylinder rod) is at least 5 - 6 mm. If this size is smaller, hold the rod with a wrench, release lock nut 1 and, turning adjusting nut 2 and checking the lever stroke, set its free stroke within 5 - 6 mm.
| The position of the wrench when adjusting the clutch pedal travel of ZIL-130 cars is 131. |
To adjust the free travel of the clutch pedal, first remove the release spring of the working cylinder, and then turn the clutch release fork lever until the thrust bearing rests on the heel of the release levers. If the lever stroke is less than 4 - 5 mm, hold the working cylinder rod with a wrench, release the lock nut and, by unscrewing or tightening the adjusting nut, set the free stroke of the lever within 4 - 5 mm. Then lock the adjusting nut and, having installed the release spring, check the free play of the clutch pedal.
| Checking the free play of the clutch pedal. |
To adjust the free travel of the clutch pedal on a MAZ-205 vehicle, you must first adjust the pressure of the clutch spring, and then the size of the gap between the clutch lever clutch and the clutch release clutch bearing.
How to adjust the free play of the pedal of a service brake system with a pneumatic drive.
On cars of the Minsk Automobile Plant, adjustment of the free play of the clutch pedal is carried out in a similar way, with the only difference being that you have to disconnect the rod and change its length by unscrewing or screwing in the fork located on it.
| Adjusting the clutch pedal free play of ZIL-130 vehicles. / - adjusting nut, 2 - clutch drive rod. |
For vehicles with a hydraulic clutch release, the pedal free play adjustment has significant differences. The free play of the clutch pedal in this case consists of free play in the mechanical and hydraulic drives. In a mechanical drive, free play depends on the clearances between the fork and the clutch release bearing, as well as on the play in the hinge joints. In a hydraulic drive, free play depends on the stroke of the master cylinder piston from its extreme position until the edge of the cuff overlaps the bypass hole and on the clearance between the pusher and the piston.
Main signs of a faulty clutch drive
The clutch in a car serves to connect and disconnect the engine with the transmission, this is necessary to engage a gear, downshifting or upshifting. The connecting unit between the gearbox and the motor can be mechanically or hydraulically driven:
- mechanics are controlled by a cable;
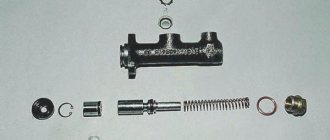
- The hydraulic drive has a main and working cylinder.
Any drive can be adjusted, and with the help of a rod or cable, the clutch pedal (PS) can be raised higher or lower.
Each clutch must have a small free play; if it is too large, then:
- PS picks up at the very end of the pedal stroke, and there is not enough squeezing to change gears normally;
- the car starts to move even if the pedal is at the very floor;
- If the gearbox is in a low position, the gearbox may fail.
If the PS is raised too high and there is practically no free play of the pedal, other problems arise:
- the car slips and accelerates poorly;
- The clutch disc (CD) starts to burn, and it does not provide a reliable connection between the internal combustion engine and the gearbox.
The main signs of a faulty mechanical drive (cable):
- the squeeze is very tight, or when pressed the pedal does not press at all;
- The PS is completely lowered, it lies on the floor;
- The pedal is very easy to press.
The cable drive may have the following causes of malfunction:
- the clutch cable (TC) has soured in the cage, so it is difficult to “move” in it;
- The vehicle has become unraveled, and pieces of wire prevent the cable from moving in the braid;
- the cable simply broke.
The hydraulic drive also has its own faults, and there are signs of a faulty condition:
- the pedal fails the first time, and begins to take off only from the second or third stroke;
- The PS becomes “cotton”, the efficiency of squeezing disappears;
- somewhere in the middle of the stroke the pedal becomes stuck.
Checking and adjusting the clutch of a Gazelle car
Gazelle commercial vehicles are equipped with a hydraulic clutch drive. On this machine, the free play of the pedal can be adjusted in only two ways:
- lengthen or shorten the rod located at the PS itself in the car interior;
- Place an extended or adjustable rod between the slave cylinder and the clutch fork (BC).
As the clutch disc wears, the free play of the pedal begins to increase, and in this case, adjustment is required. If this free play is too large (more than one third of the total travel),
its regulation is carried out by a rod in the cabin:
- the locknut is loosened;
- the rod is unscrewed in the direction of increasing the stroke;
- When the pedal is raised to the desired height, the rod is fixed by tightening the lock nut.
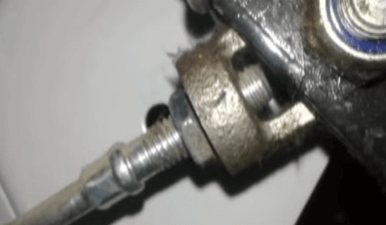
If the DS is already very worn out, but it is necessary for it to still serve, you can install an extended rod or an adjustable rod between the working cylinder and the fork (for example, from a UAZ SUV).
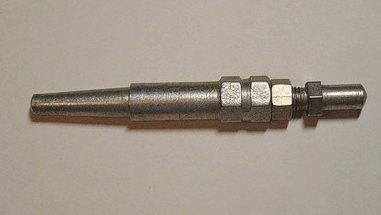
You can check the condition of the Gazelle parts by external inspection; to do this, you need to put the car on a pit or a lift, and inspect it from below:
- the clutch slave cylinder (CSC) must not have any leaks;
- The aircraft should not have cracks or bent.
Clutch adjustment Lada Kalina (Priora)
On Lada Priora and Kalina cars, a mechanical clutch drive is installed, the release is carried out by a cable. As the DS wears, the free play of the pedal increases, and then adjustment is required.
The cable adjustment on Lada models is done under the hood; it is carried out with two nuts that are attached to the gearbox bracket. We adjust the clutch as follows:
- dismantle the air filter housing, it prevents you from getting to the cable;
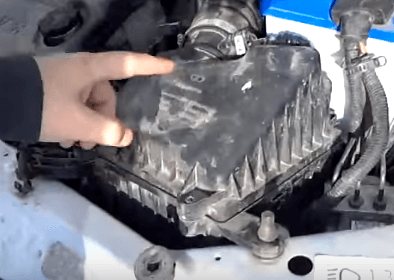
- loosen the nuts and tighten the cable, unscrew the nut in the picture below with the arrow, and tighten the other nut. Thus, we remove the increased stroke and bring it back to normal;
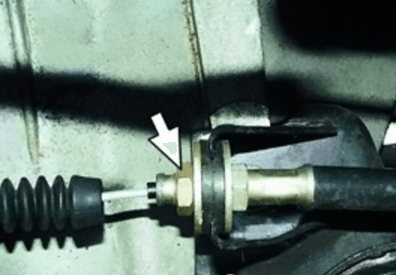
- After making sure that the pedal is pressed normally (the free play is adjusted), tighten the nuts with force.
Regulation of the VAZ 2110 vehicle is carried out in the same way as on the Lada Priora or Kalina; the clutch on the “nines” and “eights” is also adjusted.
Clutch adjustment on UAZ SUVs
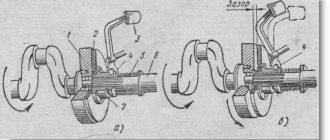
On older models, such as the UAZ 452 “Loaf” or the UAZ 469 “Kozlik”, regulation is carried out using a rod, which is located between the fork and the working cylinder. On many UMZ engines of these machines, a claw clutch is installed, and adjustment can also be made using claw-type levers, which are located on the clutch basket (drive disk).
It should be noted that foot baskets are installed on KAMAZ, ZIL, GAZ-53/3307 trucks.
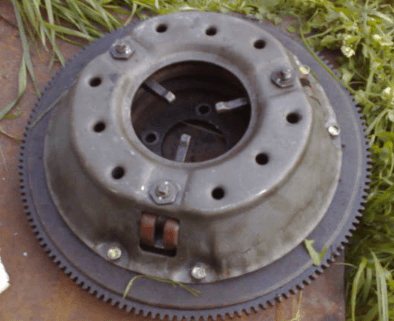
You can adjust the paws both with the basket removed and as part of the car. On the removed parts, we perform the operation in the following order:
- install the basket with the DS on the flywheel, tighten the basket with bolts;
- loosen the adjusting nuts;
- Using a caliper we measure the distance from the end of the levers to the flywheel, using the adjusting nuts we set the same distance;
- according to the book instructions, the distance between the flywheel and the foot should be 51.5 mm, provided that the thickness of the disk is 9.5 mm;
- we lock the nuts; at this point the adjustment procedure can be considered complete.
You can also adjust the paws directly on the car without removing the clutch. We proceed as follows:
- put the car in a pit, remove the lower clutch housing pan;
- We take a wooden rod 70-80 mm long, use a ruler or caliper to mark a distance of 51.5 mm on the rod, it can be a little inaccurate, but we still make the final adjustment using a rod;
- turn the flywheel so you can get to the foot;
- Unlock and turn the adjusting nut, set the rod to 51.5 mm;
- We turn the flywheel further and do the same procedure with the other two legs;
- Before putting everything back together, we sit behind the wheel, start the engine and check how the car behaves while moving away;
- If everything is fine, don’t forget to lock the nuts and put the tray in place.
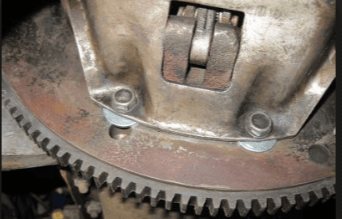
When the legs of the UAZ drive disk are worn out, some car owners, in order not to repair the basket and drive a little more, place washers of the same thickness under all its mounting bolts.
There is another way to adjust the paws, but it needs to be done by two people. The work is carried out as follows:
- one of the participants in the operation sits on the steering wheel and squeezes the clutch all the way;
- the second participant rotates the flywheel, unlocks the tabs, makes adjustments, setting the gap between the flywheel and the clutch disc to 1.5 mm; for this you will need a set of feeler gauges that are used to regulate the valves in the engine;
- the gap may differ slightly from 1.5 mm, it is important here that all paws are adjusted to the same distance;
- Having completed the adjustment, we check the clutch, trying to move off. If the car starts moving smoothly, lock the nuts and put the lower crankcase pan in place.
Adjusting the KAMAZ clutch: instructions
Clutch adjustments KamAZ-5320:
- tighten the clutch pneumatic booster mounting bolts:
- Check by external inspection the tightness of the clutch drive, if necessary, eliminate the leak and bleed the hydraulic system of the drive;
- check the action of the release springs of the clutch pedal and the clutch fork shaft lever, and if necessary, correct the faults;
- adjust the clutch drive;
- lubricate the clutch release clutch bearing and the clutch release fork shaft bushing;
- check the fluid level in the clutch compensation tank and top up if necessary;
- drain the condensate from the pneumatic hydraulic booster (PGU).
Adjusting the Kamaz-5320 clutch drive consists of checking and adjusting the free travel of the clutch pedal, the free travel of the clutch release clutch and the full travel of the PGU pneumatic hydraulic booster pusher.
Checking and adjusting the free play of the Kamaz-5320 clutch release clutch is carried out by manually moving the fork shaft lever from the adjusting spherical nut, the pusher of the pneumatic hydraulic booster of the PGU clutch drive (in this case, it is necessary to disconnect the spring from the lever).
If the free play of the lever, measured at a radius of 90 mm, turns out to be less than 3 mm, then adjust it with the spherical nut of the Kamaz PGU pneumatic hydraulic booster pusher to a value of 3.7... 4.6 mm, which corresponds to the free play of the clutch release 3.2... 4 mm.
Then check the full stroke of the pusher of the PGU Kamaz-5320 pneumatic hydraulic clutch by pressing the clutch pedal all the way, while the full stroke of the pusher must be at least 25 mm; with a smaller stroke, complete disengagement of the clutch is not ensured.
If the pusher of the pneumatic hydraulic booster of the Kamaz-5320 clutch is insufficient, check the free play of the clutch pedal, the amount of fluid in the master cylinder and the clutch reservoir, and if necessary, bleed the clutch hydraulic system.
The free play of the pedal, corresponding to the start of operation of the master cylinder, should be 6 ... 12 mm. It should be measured in the middle part of the clutch pedal area. If the free play is outside the limits specified above, adjust the clearance A between the piston and the master cylinder piston pushrod.
Adjust the gap between the piston and the piston pusher of the Kamaz-5320 clutch master cylinder using an eccentric finger that connects the upper eye of the pusher to the pedal lever.
Adjust the clearance when the release spring presses the clutch pedal against the upper stop. Turn the eccentric pin so that the movement of the pedal from the top stop until the pusher touches the piston is 6 ... 12 mm, then tighten and cotter the castle nut.
Lubricating the Kamaz-5320 clutch. Lubricate the clutch release fork shaft bushings and the clutch release clutch bearing through grease fittings (grease fitting), making no more than three strokes with a syringe. Otherwise, excess lubricant may get into the clutch housing.
Check the fluid level in the compensation tank of the master cylinder visually. The normal liquid level in the tank corresponds to 15...20 mm from the top edge of the tank.
The total volume of fluid in the Kamaz-5320 hydraulic clutch is 380 cm3. During service (in the fall), change the fluid in the clutch hydraulic system.
You also need to know the distance at which the thrust ring of the clutch basket adjustment levers should be located. The persistent ring is also called “penny” or “spider”. So, the distance from the working surface of the clutch disc to the “penny” should be approximately 51 mm, and the gap between the release bearing and the “penny” should be 2-3 mm (adjust this gap with the PGU rod).
Adjusting the clutch of a KAMAZ vehicle may be necessary if it begins to slip. Some drivers also encounter problems such as pedal movement problems. In such situations, first of all, it is better to try to adjust the clutch. Read more about this in our article today.
Read more: Which spray gun is better, air or airless - novaso
So, setting up the clutch involves performing three procedures, each of which will be discussed in detail.
Most domestic motorists repair their vehicles themselves. Therefore, this material will be useful for those who carry out car maintenance with their own hands. Now we will tell you how to adjust the pads of the Kamaz clutch basket and what is needed for this.
Content
[ To uncover]
[Hide]
In Kamaz vehicles, the clutch performs the function of ensuring smooth starting of the vehicle, as well as disconnecting the engine from the transmission system when changing gears. The need to adjust the clutch basket feet (hereinafter referred to as the CS) in these car models is a common problem faced by many KamAZ owners.
Paws for KAMAZ clutch basket
The clutch in this car is an important and necessary component of the clutch system. Setting it up is an integral part of technical work, so KamAZ owners will not be able to avoid this activity.
These cars have managed to gain immense popularity due to their high reliability. KamAZ trucks are actively and successfully used in the construction industry, in the agricultural sector, as well as in any other areas where it is necessary to transport large loads. To ensure that this equipment does not let its owner down, it is necessary to monitor the serviceability and condition of all elements.
It consists of checking and installing the free play of the clutch release clutch and the full travel of the pneumatic booster pusher.
The free play of the clutch release clutch is checked by manually moving the fork shaft lever away from the adjusting spherical nut of the pusher (while disconnecting the spring from the lever). If the free play of the lever, measured at a radius of 90 mm, is less than 3 mm, it should be adjusted with a spherical pusher nut to 4-5 m, which corresponds to a free play of the clutch of 3.2-4.0 mm.
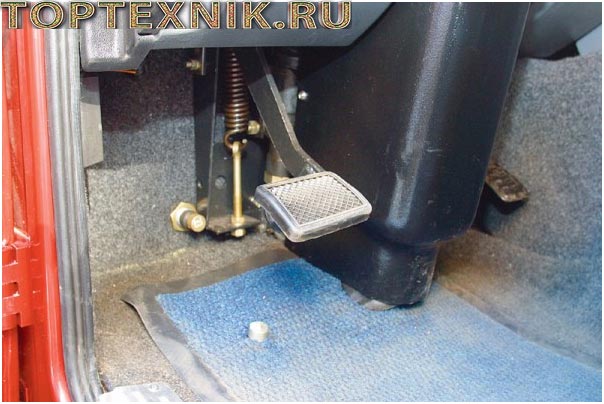
Then check the full stroke of the pusher of the pneumatic booster by pressing the clutch pedal all the way, while the full stroke of the pusher must be at least 25 mm. With a smaller stroke value, complete disengagement of the clutch is not ensured.
If the PSU pusher travel is insufficient, check the free travel of the clutch pedal and the fluid level in the clutch master cylinder reservoir; If necessary, remove air from the clutch hydraulic system.
The free play of the pedal, corresponding to the start of operation of the master cylinder, should be 6-15 mm. Measure it in the middle part of the clutch pedal area. If the free play value exceeds the limits specified above, adjust the clearance between the piston and the master cylinder piston pushrod with the eccentric pin that connects the top eye of the pushrod to the pedal arm.
Adjust the clearance when the clutch pedal is pressed against the upper stop by the release spring. Turn the eccentric pin so that the pedal moves from the top stop to the pusher touching the piston by 6-15 mm, then tighten and cotter the castle nut. The full travel of the clutch pedal should be 185-195 mm.
Brief technical characteristics of the clutch
Clutch – diaphragm, double-disc model 17 or single-disc, diaphragm, pull-type model GMFZ 430 from F{amp}amp;S (Germany).
The control drive is hydraulic, equipped with a pneumatic booster.
In the clutch control drive, to reduce the effort on the pedal, an additional servo spring is introduced, attached at one end. to the top of the pedal, the other to the bracket.
Determine the free play of the clutch release clutch (for clutch model 17) by moving the lever by hand (see Fig. Free play of the clutch release clutch). Disconnect the spring. The normal stroke of the clutch corresponds to a lever stroke of 4-5 mm. If the lever stroke is less than 3 mm, then adjust the lever stroke by rotating the spherical nut.
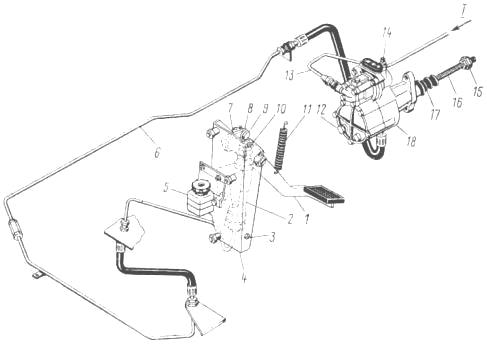
To release the clutch of the GMEZ 430 model, a drive without a gap between the clutch release clutch and the diaphragm is used.
| Clutch model | 17 | GMFZ 430 |
| Transmitted torque, N.m (kgf.m) | 1350 (135) | 1600 (160) |
| Diaphragm force during adhesion, kN (kgf): | ||
| - turned on | 18,5 (1850) | 28 (2800) |
| - turned off | 17,5 (1750) | 25 (2500) |
Model 17 clutch
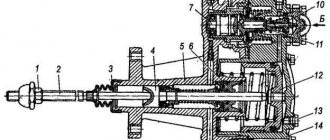
adjust the gap between the piston and the pusher 10 of the master cylinder piston using the eccentric pin 13, which connects the upper eye of the pusher 10 with the pedal lever 12 at the position when the tension spring 15 presses the clutch pedal to the upper stop.
After this, you need to turn the eccentric pin 13 so that the movement of the pedal from the top stop until the pusher touches the piston is 6-12 mm.
Having completed the above, you need to tighten and pin the castle nut.
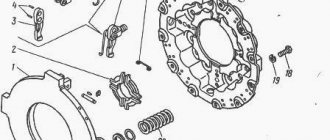
1 – spring fastening bar; 2 — air supply tube to the pneumatic booster; 3 — fork shaft lever; 4 - spherical nut; 5 - lock nut; 6 — piston pusher; 7 and 15 — tension springs; 8 — pneumatic amplifier; 9 — bracket for fastening the clutch pedal; 10 — master cylinder piston pusher; 11 — pedal travel limiter; 12 — lever; 13 — eccentric pin; 14 — clutch pedal; 16 - main cylinder.
1 - screw; 2 - clutch housing; 3 - flywheel; 4 - input shaft; 5, 7 - driven disc hubs; 6 - torsional vibration damper spring; 8 - friction lining; 9 - driven disc; 10 - limit pin; 11 - middle drive disk; 13 — pressure disk; 14 — diaphragm ring; 15 — support ring; 16 — clutch lubrication hose;
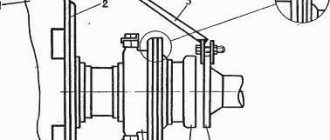
1 — gearbox input shaft; 2 — driven disk hub; 3 — driven disk; 4 — pressure disk; 5 - diaphragm; 6 — clutch release clutch.
Checking and adjusting the clutch on a VAZ 2107 car
Just like on many vehicles, adjusting the free play of the VAZ 2107 clutch pedal is done from inside the car. It is adjusted with an adjusting screw, which is located next to the PS; according to the instructions, the free play should be from 30 to 35 mm. But not all drivers like to do what is written in the instructions, and many adjust the pedal based on their preferences.
The second adjustment is made by the rod, which is located between the control center and the fork. The lock nut on the rod is loosened, and the rod is adjusted to such a length that it moves freely at a distance of 4-5 mm.
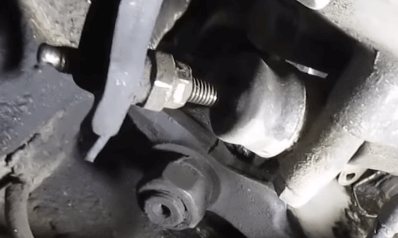
How to replace a clutch
To assemble a clutch from old parts or install new ones, you need to use a special device sold at the appropriate retail outlets. Compress the pressure plate springs and insert the process bolts to secure them. Then mount the process shaft into the flywheel bearing race (inner). It is needed for the correct mutual installation of the driven disk hubs.
Clutch adjustment
Rotating the rod allows you to adjust the free play of the clutch pedal. The pedal lever in the released position should rest against the floor of the tractor cab. If this is not the case, you need to adjust the system by gradually unscrewing the thrust bolt from the bracket. It happens that this adjustment does not lead to the desired results. In this case, you need to loosen the bolt securing the bracket, and then turn the bracket clockwise - towards the spring.
If the clutch release mechanism is adjusted correctly, the gap between the protrusions of the levers should be 2.5-3.5 mm.
source
Features of Renault Logan clutch adjustment
Renault Logan cars are equipped with a cable drive; exactly the same cable is present on the Renault Sandero model. This drive comes with all manual transmissions, regardless of engine type.
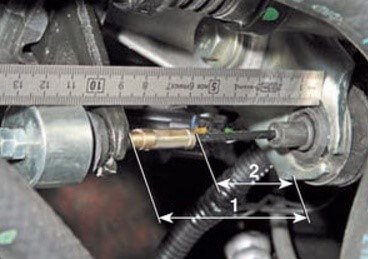
The cable is adjusted with a nut located on the cable itself, it is located next to the clutch fork. According to factory conditions, for an unworn DS, the cable should have a length between the gearbox bracket and the fork 86 plus or minus 5 mm; what the distances should be is shown in the figure below.
Over time, the clutch disc wears out and becomes thinner. Because of this, the PS rises, and the free play needs to be adjusted.
In order to adjust the pedal stroke, use a 10 wrench to loosen the lock nut, hold the hex key with a 7 wrench, and turn the adjusting nut.
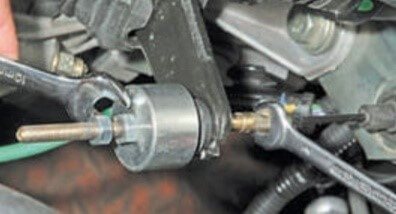
Having established the required position of the Logan PS, we fix the cable tension with a locknut. We check the car while driving; if the free movement is not satisfactory, we repeat the operation.
Clutch adjustment on Hyundai cars
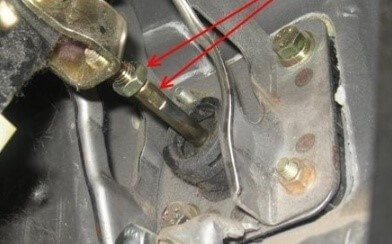
The clutch drive on Hyundai vehicles is hydraulic, gear shifting at the gearbox is cable. Hyundai Getz, Elantra, Accent, Tucson, Solaris, etc. cars are equipped with a hydraulic drive. On almost all Hyundai models, the clutch pedal is adjusted from the passenger compartment. For example, on a Hyundai Accent PS car it is connected to the main cylinder, and a rod is installed between these parts, which can be adjusted. The free play of the PS is adjusted with this rod:
- use a 12 mm wrench to loosen the locknut;
- Use a 6 mm wrench to turn the rod, setting the desired position of the pedal;
- tighten the locknut.
The need for regular maintenance of the unit
To ensure that the mechanism works properly and does not annoy the owner with malfunctions, it is recommended to perform maintenance along with the adjustment work. So, the bolt holding the pneumatic booster should be tightened well. The mechanism is also checked for leaks of working fluid. If a leak is found, it should be repaired.
Similar articles:
- Clutch adjustment concept, process instructions, preparation and steps
- VAZ 2106 clutch device replacement of basket and disc adjustment and repair instructions with photos and videos
- How it works, malfunctions and do-it-yourself adjustment of the VAZ 2107 clutch, why it slips, how to adjust, instructions with photos and videos
- Clutch pedal adjustment: how the procedure is performed
How to adjust pedal free play on Nissan cars
As the clutch parts (disc and basket) wear out, the free play changes, and therefore requires adjustment. On a Nissan car, the clutch drive can be different - mechanical and hydraulic, so the PS adjustment is carried out differently. For example, a cable is installed on Nissan Sunny cars in bodies N13 and N14, Almera, Primera; Qashqai, Tiida, Almera Classic, Note, Maxima cars are equipped with a hydraulic drive.
However, a hydraulic drive can also be installed on Sunny or Primera, much depends on the type of engine and model generation. Nissan “hydraulics” are usually equipped with cars with more powerful internal combustion engines (2.0/ 2.5/ 3.0 l); cars with 1.4/ 1.5/ 1.6 l engines come with a clutch cable.
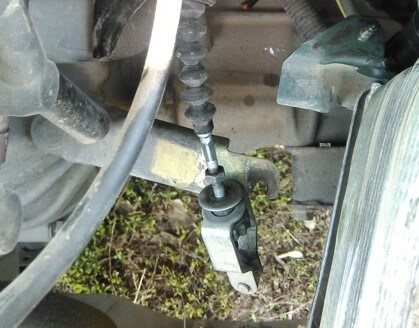
On a Nissan N14 car, the cable is adjusted in the area of the clutch fork; the adjustment mechanism is located at the very end of the cable.
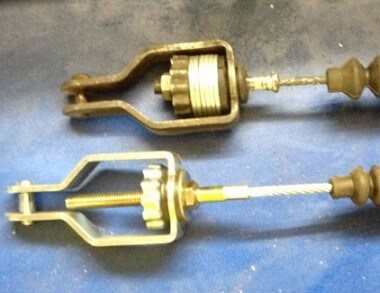
The same cable is installed on the Almera, and in order to shorten it when the DS linings are worn out, car owners add washers, and in this case it is no longer secured with a lock nut.
Like on a Hyundai car, the GCS on Nissans is located next to the pedal; these parts are connected to each other by a rod on which there is an adjustment.
To adjust the free play of the PS on the Nissan Almera N16 ( />
Adjustment - free play - pedal
Wear of the friction linings of the driven discs can be compensated by adjusting the free play of the clutch pedal. Therefore, the free play of the pedal should be periodically (at TO-2) checked and, if necessary, adjusted.
| Adjusting the free play of the clutch pedal with a hydraulic drive (GAZ-66 car. |
On passenger cars with a hydraulic clutch, the procedure for adjusting the free play of the clutch pedal is not fundamentally different from that adopted on trucks.
Clutch maintenance consists of periodically checking the condition of the clutch, adjusting the free play of the clutch pedal, lubricating the half-bearing and clutch release drive, and eliminating individual malfunctions that occur during clutch operation.
The method of adjusting the free play of the brake pedal depends on the type of brake drive of the vehicle.
The clutch release drive has two independent adjustments: adjustment of the pedal free play and adjustment of the gap between the rod and the driver of the pneumatic amplifier.
| Adjusting the free play of the clutch pedal with a mechanical drive (ZIL-130 car. |
When the clutch pedal is fully pressed, the stroke of the pusher 10 of the working cylinder must be at least 23 mm. If the pusher stroke is less than the specified value, this indicates a violation of the pedal free play adjustment or air entering the hydraulic drive system. In this case, it is necessary to bleed the hydraulic drive and, if necessary, adjust the free play of the clutch pedal.
Adjustment of the free play of the clutch pedal (which is 30 - 50 mm for most domestic cars) is carried out according to the gap (1 5 - 4 mm) between the ends of the levers and bearings of the clutch release clutch by changing the length of the pedal rod, rotating the nut or fork of the rod. When servicing clutches in which the disks are compressed by a central spring, adjusting the pedal free play is preceded by adjusting the spring compression force. For hydraulically driven clutches, the free play of the pedals is additionally adjusted by changing the gap between the pusher and the master cylinder piston.
To ensure free movement of the clutch release clutch as the linings of the driven discs wear out, it becomes necessary to adjust the clutch drive. The clutch release drive for GAZ-24-10 and KamAZ vehicles is hydraulic, while for ZIL-431410 and GAZ-53-12 vehicles it is mechanical. Adjusting the clutch release mechanism drive of KamAZ vehicles consists of checking and adjusting the free travel of the clutch pedal, the free travel of the clutch release clutch and the full travel of the pneumatic booster pusher.
| Adjusting the free play of the clutch pedal with a mechanical drive (ZIL-130 car. |
When the clutch pedal is fully pressed, the stroke of the pusher 10 of the working cylinder must be at least 23 mm. If the pusher stroke is less than the specified value, this indicates a violation of the pedal free play adjustment or air entering the hydraulic drive system. In this case, it is necessary to bleed the hydraulic drive and, if necessary, adjust the free play of the clutch pedal.
The free travel of the clutch pedal: leniya (for most domestic cars is 30 - 50 mm) is adjusted according to the gap between the ends of the levers and bearings of the clutch release clutch (1 5 - 4 mm), changing the length of the pedal rod by rotating the nut or rod fork. When servicing clutches in which the disks are compressed by a central spring, adjusting the pedal free play is preceded by adjusting the spring compression force. For hydraulically driven clutches, the free play of the pedals is additionally adjusted by changing the gap between the pusher and the master cylinder piston.
| Diagram of the structure and operation of the differential. |
Clutch slipping can occur due to lack of free play of the clutch pedal, oiling or wear of the friction linings of the driven disc. In this case, the torque from the engine is not fully transmitted and the car moves away very slowly or even stands still with the gear engaged and the clutch pedal released. To eliminate the malfunction, you need to check the amount of free play in the center of the clutch pedal pad, which should be 35 - 45 mm on the Moskvich-412 car and 20 - 30 mm on the VAZ-2101. If, after adjusting the free play of the pedal, the clutch continues to slip, it must be removed, washed or the driven disc linings replaced.
What you need to know about clutch malfunctions
- If, during the operation of the car, the PS gradually begins to move upward, most likely the lining of the driven disk is worn out.
- When the clutch slips, the interior smells of burnt linings (ferodo). Checking the wear of the linings is quite simple: put the car in “handbrake”, start the engine, squeeze the clutch, add gas, and smoothly release the throttle. If the engine barely slows down, the disc pads are worn out. If the internal combustion engine stalls, the clutch is fine.
- Slipping can occur not only due to worn friction linings of the disc, oil can get on the basket and disc. To check your guess, you need to place the car on a lift or pit and perform an external inspection of the engine and gearbox from below. Oil enters the clutch through the gearbox input shaft oil seal, through the rear oil seal of the internal combustion engine.
- If the PS is stuck, then it could be: the fork has become sour, the piston has jammed in the working cylinder, the fork has flown off the release bearing hub (on ZMZ-402, UMZ engines of various models).
- If the PS has become “wobbly”, and in order to change gear normally, you need to depress the clutch pedal twice, it means that the master cylinder valves have begun to bypass. In this case, repair of the main circulation system or its replacement is necessary.
